linux下命令行安装oracle 11g数据库_linux安装oracle11g命令行安装-程序员宅基地
技术标签: oracle oracle 11g 安装oracle数据库
Centos6命令行安装oracle11g
参考网址
https://blog.csdn.net/ageeklet/article/details/81603482
1、准备:
本次安装的基本环境:vmware中安装centos6.10(虚拟机安装这里就不做介绍了)
注意:系统位数和数据库位数 我现在都是64位的 数据库的版本和系统的版本一定要一致 x64就是64位的
我之前就是系统是32位的 数据库是64位的 安装就报错了
虚拟机要求:内存推荐2G以上 空间推荐50G以上
需要下载Linux版本下对应的oracle安装包:
下载地址:http://www.oracle.com/technetwork/database/enterprise-edition/downloads/index.html
或者
链接:https://pan.baidu.com/s/1UcMUDlK-UupS_ermOnw5bg
提取码:oijw

上面的那个是11.2.0.4.0 下面的那两个是11.2.0.1.0 里面还有一些依赖包和安装方法 但是下面的这个安装方法是没问题的
对应的oracle版本:
linux.x64_11gR2_database_1of2.zip
linux.x64_11gR2_database_2of2.zip
2、机器基础配置修改
(1)设置系统:Oracle只支持操作系统Red Hat Enterprise Linux 6,故需将/etc/redhat-release中的内容改成Red Hat
[root@Oracle ~]# vi /etc/redhat-release
#CentOS release 6.10 (Final)
Red Hat Enterprise Linux 6
(2)机器信息关闭,selinux,防火墙的不必要的服务
[root@Oracle ~]# cat /etc/selinux/config //selinux关闭(disabled)
# This file controls the state of SELinux on the system.
# SELINUX= can take one of these three values:
# enforcing - SELinux security policy is enforced.
# permissive - SELinux prints warnings instead of enforcing.
# disabled - No SELinux policy is loaded.
SELINUX=disabled
# SELINUXTYPE= can take one of these two values:
# targeted - Targeted processes are protected,
# mls - Multi Level Security protection.
SELINUXTYPE=targeted
[root@Oracle ~]# /etc/init.d/iptables stop //防火墙关闭
[root@Oracle ~]# vi /etc/hosts
127.0.0.1 localhost localhost.localdomain localhost4 localhost4.localdomain4
::1 localhost localhost.localdomain localhost6 localhost6.localdomain6
192.168.152.130 Oracle //新增行:IP 机器名(这是我的ip和主机名)
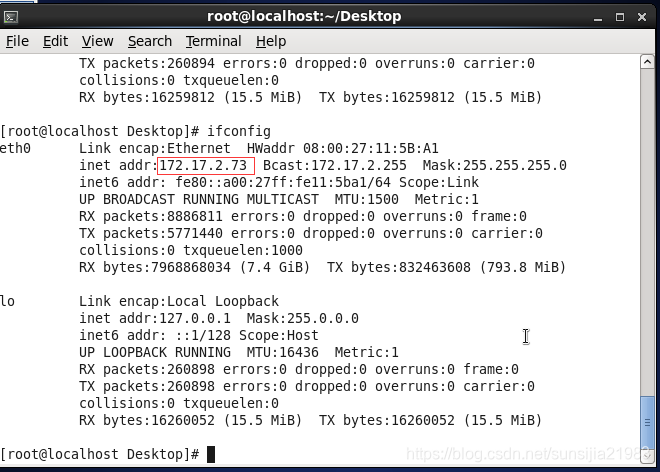
就是这个ip
(3)修改用户的限制文件
[root@Oracle ~]# cat /etc/security/limits.conf //在该文件内添加以下内容
oracle soft nproc 2047
oracle hard nproc 16384
oracle soft nofile 1024
oracle hard nofile 65536
oracle soft stack 10240
(4)修改内核参数
[root@Oracle ~]# cat /etc/sysctl.conf //在文件中添加以下内容
net.ipv4.ip_local_port_range= 9000 65500
fs.file-max = 6815744
kernel.shmall = 10523004
kernel.shmmax = 6465333657
kernel.shmmni = 4096
kernel.sem = 250 32000 100128
net.core.rmem_default=262144
net.core.wmem_default=262144
net.core.rmem_max=4194304
net.core.wmem_max=1048576
fs.aio-max-nr = 1048576
[root@Oracle ~]# sysctl –p // 执行这条语句使配置生效
(5)依赖包安装
[root@Oracle ~]# yum -y install binutils compat-libcap1 compat-libstdc++-33 compat-libstdc++-33*.i686 elfutils-libelf-devel gcc gcc-c++ glibc*.i686 glibc glibc-devel glibc-devel*.i686 ksh libgcc*.i686 libgcc libstdc++ libstdc++*.i686 libstdc++-devel libstdc++-devel*.i686 libaio libaio*.i686 libaio-devel libaio-devel*.i686 make sysstat unixODBC unixODBC*.i686 unixODBC-devel unixODBC-devel*.i686 libXp
3、建立用户、组,安装目录
(1)建立用户、组
[root@Oracle ~]# groupadd oinstall
[root@Oracle ~]# groupadd dba
[root@Oracle ~]# groupadd oper
[root@Oracle ~]# useradd -g oinstall -G dba,oper oracle
[root@Oracle ~]# echo "oracle" | passwd --stdin oracle
[root@Oracle ~]# id oracle //查看用户所属组
uid=501(oracle) gid=501(oinstall) groups=501(oinstall),502(dba),503(oper)
(2)新建安装目录
[root@Oracle ~]# mkdir -p /var/app
[root@Oracle ~]# mkdir -p /var/app/oracle
[root@Oracle ~]# mkdir -p /var/app/oracle/product
[root@Oracle ~]# mkdir -p /var/app/oracle/product/11.2.0
[root@Oracle ~]# mkdir -p /var/app/oracle/product/11.2.0/dbhome_1
[root@Oracle ~]# mkdir -p /home/oracle/backup
[root@Oracle ~]# mkdir -p /home/oracle/oraInventory
[root@Oracle ~]# chown -R oracle:oinstall /var/app
[root@Oracle ~]# chown -R oracle:oinstall /home/oracle/backup
[root@Oracle ~]# chown -R oracle:oinstall /home/oracle/oraInventory
[root@Oracle ~]# chmod -R 775 /var/app
(3)设置并刷新环境变量
[root@Oracle ~]# cat /home/oracle/.bash_profile //给该文件添加以下内容
umask 022
export ORACLE_BASE=/var/app
export ORACLE_HOME=$ORACLE_BASE/oracle/product/11.2.0/dbhome_1
export ORACLE_SID=ora11g
export PATH=$PATH:$HOME/bin:$ORACLE_HOME/bin
export LD_LIBRARY_PATH=$ORACLE_HOME/lib:/usr/lib
[root@Oracle ~]# source /home/oracle/.bash_profile //执行该句使配置生效
4、安装Oracle
(1)拷贝Oracle安装文件到指定目录
[root@Oracle ~]# cp linux.x64_11gR2_database_*.zip /var/app/oracle/
(2)切换到oracle用户,解压安装包
[root@Oracle ~]# su - oracle
[oracle@Oracle ~]$ cd /var/app/oracle/
[oracle@Oracle oracle]$ unzip linux.x64_11gR2_database_1of2.zip
[oracle@Oracle oracle]$ unzip linux.x64_11gR2_database_2of2.zip
解压后得到database目录,其中response目录里面有三个rsp文件,用来作为静默安装时应答文件的模板。分别为:
[oracle@Oracle response]$ ls -l
total 76
-rw-rw-r-- 1 oracle oinstall 44960 Aug 8 17:10 dbca.rsp //安装应答
-rw-rw-r-- 1 oracle oinstall 22752 Aug 8 14:23 db_install.rsp //创建数据库应答
-rwxrwxr-x 1 oracle oinstall 5740 Feb 26 2009 netca.rsp //建立监听,本地服务名等网络设置
(5)修改配置文件,安装Oracle数据库
[oracle@Oracle database]$ cp /var/app/oracle/database/response/ /home/oracle/ //备份
(6)修改后的静默安装配置文件db_install.rsp内容如下:
[root@db response]# cat db_install.rsp | grep -v '^#' | grep -v '^$'
oracle.install.responseFileVersion=/oracle/install/rspfmt_dbinstall_response_schema_v11_2_0
oracle.install.option=INSTALL_DB_SWONLY
ORACLE_HOSTNAME=db
UNIX_GROUP_NAME=oinstall
INVENTORY_LOCATION=/var/app/oracle/oraInventory
SELECTED_LANGUAGES=en,zh_CN
ORACLE_HOME=/var/app/oracle/product/11.2.0/dbhome_1
ORACLE_BASE=/var/app/oracle
oracle.install.db.InstallEdition=EE
oracle.install.db.isCustomInstall=false
oracle.install.db.customComponents=oracle.server:11.2.0.1.0,oracle.sysman.ccr:10.2.7.0.0,oracle.xdk:11.2.0.1.0,oracle.rdbms.oci:11.2.0.1.0,oracle.network:11.2.0.1.0,oracle.network.listener:11.2.0.1.0,oracle.rdbms:11.2.0.1.0,oracle.options:11.2.0.1.0,oracle.rdbms.partitioning:11.2.0.1.0,oracle.oraolap:11.2.0.1.0,oracle.rdbms.dm:11.2.0.1.0,oracle.rdbms.dv:11.2.0.1.0,orcle.rdbms.lbac:11.2.0.1.0,oracle.rdbms.rat:11.2.0.1.0
oracle.install.db.DBA_GROUP=dba
oracle.install.db.OPER_GROUP=oinstall
oracle.install.db.CLUSTER_NODES=
oracle.install.db.config.starterdb.type=GENERAL_PURPOSE
oracle.install.db.config.starterdb.globalDBName=ora11g
oracle.install.db.config.starterdb.SID=ora11g
oracle.install.db.config.starterdb.characterSet=AL32UTF8
oracle.install.db.config.starterdb.memoryOption=true
oracle.install.db.config.starterdb.memoryLimit=1500
oracle.install.db.config.starterdb.installExampleSchemas=false
oracle.install.db.config.starterdb.enableSecuritySettings=true
oracle.install.db.config.starterdb.password.ALL=oracle
oracle.install.db.config.starterdb.password.SYS=
oracle.install.db.config.starterdb.password.SYSTEM=
oracle.install.db.config.starterdb.password.SYSMAN=
oracle.install.db.config.starterdb.password.DBSNMP=
oracle.install.db.config.starterdb.control=DB_CONTROL
oracle.install.db.config.starterdb.gridcontrol.gridControlServiceURL=
oracle.install.db.config.starterdb.dbcontrol.enableEmailNotification=false
oracle.install.db.config.starterdb.dbcontrol.emailAddress=
oracle.install.db.config.starterdb.dbcontrol.SMTPServer=
oracle.install.db.config.starterdb.automatedBackup.enable=false
oracle.install.db.config.starterdb.automatedBackup.osuid=
oracle.install.db.config.starterdb.automatedBackup.ospwd=
oracle.install.db.config.starterdb.storageType=FILE_SYSTEM_STORAGE
oracle.install.db.config.starterdb.fileSystemStorage.dataLocation=
oracle.install.db.config.starterdb.fileSystemStorage.recoveryLocation=
oracle.install.db.config.asm.diskGroup=
oracle.install.db.config.asm.ASMSNMPPassword=
MYORACLESUPPORT_USERNAME=
MYORACLESUPPORT_PASSWORD=
SECURITY_UPDATES_VIA_MYORACLESUPPORT=
DECLINE_SECURITY_UPDATES=true
PROXY_HOST=
PROXY_PORT=
PROXY_USER=
PROXY_PWD=
(7)开始静默安装
[oracle@Oracle database]$ cd /var/app/oracle/database
[oracle@Oracle database]$ ./runInstaller -silent -responseFile /var/app/oracle/database/response/db_install.rsp
(8)查看安装进度
[oracle@Oracle database]$ cd /var/app/oracle/oraInventory/logs
[oracle@Oracle logs]$ tail -f installActions*log
(9)当出现以下信息时
var/app/oracle/oraInventory/orainstRoot.sh
var/app/oracle/product/11.2.0/dbhome_1/root.sh
To execute the configuration scripts:
1. Open a terminal window
2. Log in as "root"
3. Run the scripts
4. Return to this window and hit "Enter" key to continue
Successfully Setup Software.
打开新的客户端使用root身份执行以下脚本
[root@Oracle ~]# var/app/oracle/oraInventory/orainstRoot.sh
[root@Oracle ~]# var/app/oracle/product/11.2.0/dbhome_1/root.sh
(10)执行完上面的脚本后回到安装界面按下Enter继续。
5、配置Oracle监听
(1)运行监听文件
[oracle@Oracle ~]$ cd /var/app/oracle/database/response
[oracle@Oracle response]$ netca /silent /responsefile /var/app/oracle/database/response/netca.rsp
运行成功之后,在/var/app/oracle/product/11.2.0/dbhome_1/network/admin目录下会生成sqlnet.ora和listener.ora两个文件
[oracle@Oracle admin]$ ls
listener.ora samples shrept.lst sqlnet.ora tnsnames.ora
执行以下命令查看监听器是否已经在1521端口上开始工作了
[root@Oracle ~]# netstat -tlnp | grep 1521
tcp 0 0 :::1521 :::* LISTEN 1792/tnslsnr
如果监听没有启动,则手动启动监听器
[oracle@Oracle ~]$ lsnrctl start
(2)配置Oracle数据库
[oracle@Oracle response]$ pwd
/var/app/oracle/database/response
[oracle@Oracle response]$ vi dbca.rsp
GDBNAME = "orcl11.us.oracle.com" //78 行 全局数据库的名字=SID+主机域名
SID="ora11g" //149行 SID
SYSPASSWORD = "oracle" //190行
SYSTEMPASSWORD = "oracle" //200行
CHARACTERSET="AL32UTF8" //415行 编码
NATIONALCHARACTERSET="UTF8" //425行 编码
(3)创建数据库
[oracle@Oracle ~]$ $ORACLE_HOME/bin/dbca -silent -responseFile /var/app/oracle/database/response/dbca.rsp
6、启动数据库
进入Oracle SQL命令行
[oracle@Oracle ~]$ sqlplus / as sysdba
SQL> startup
ORA-01078: failure in processing system parameters
LRM-00109: could not open parameter file '/var/app/oracle/product/11.2.0/dbhome_1/dbs/initora11g.ora'
启动时会出现以上错误,解决方法如下:找到init.ora.78201817526文件,将其复制到/var/app/oracle/product/11.2.0/dbhome_1/dbs目录下
[oracle@Oracle admin]$ locate init.ora //定位寻找目标文件
/var/app/admin/orcl11g/pfile/init.ora.78201817526 //目标文件
/var/app/oracle/product/11.2.0/dbhome_1/dbs/init.ora
/var/app/oracle/product/11.2.0/dbhome_1/srvm/admin/init.ora
[oracle@Oracle admin]$ cd /var/app/admin/orcl11g/pfile/
[oracle@Oracle pfile]$ ls
init.ora.78201817526
[oracle@Oracle pfile]$ cp init.ora.78201817526 /var/app/oracle/product/11.2.0/dbhome_1/dbs/
[oracle@Oracle dbs]$ mv init.ora.78201817526 initora11g.ora //将目标文件改成所需文件名
进入到Oracle SQL命令行中,执行startup
[oracle@Oracle ~]$ sqlplus / as sysdba
SQL*Plus: Release 11.2.0.1.0 Production on Fri Aug 10 01:59:43 2018
Copyright (c) 1982, 2009, Oracle. All rights reserved.
Connected to:
Oracle Database 11g Enterprise Edition Release 11.2.0.1.0 - 64bit Production
With the Partitioning, OLAP, Data Mining and Real Application Testing options
SQL> startup //启动数据库实例
ORACLE instance started.
Total System Global Area 839282688 bytes
Fixed Size 2217992 bytes
Variable Size 494929912 bytes
Database Buffers 339738624 bytes
Redo Buffers 2396160 bytes
Database mounted.
Database opened.
**** 参考文章:
https://blog.csdn.net/JIANG123456T/article/details/77745892
https://blog.csdn.net/zxx2403/article/details/46594597
智能推荐
while循环&CPU占用率高问题深入分析与解决方案_main函数使用while(1)循环cpu占用99-程序员宅基地
文章浏览阅读3.8k次,点赞9次,收藏28次。直接上一个工作中碰到的问题,另外一个系统开启多线程调用我这边的接口,然后我这边会开启多线程批量查询第三方接口并且返回给调用方。使用的是两三年前别人遗留下来的方法,放到线上后发现确实是可以正常取到结果,但是一旦调用,CPU占用就直接100%(部署环境是win server服务器)。因此查看了下相关的老代码并使用JProfiler查看发现是在某个while循环的时候有问题。具体项目代码就不贴了,类似于下面这段代码。while(flag) {//your code;}这里的flag._main函数使用while(1)循环cpu占用99
【无标题】jetbrains idea shift f6不生效_idea shift +f6快捷键不生效-程序员宅基地
文章浏览阅读347次。idea shift f6 快捷键无效_idea shift +f6快捷键不生效
node.js学习笔记之Node中的核心模块_node模块中有很多核心模块,以下不属于核心模块,使用时需下载的是-程序员宅基地
文章浏览阅读135次。Ecmacript 中没有DOM 和 BOM核心模块Node为JavaScript提供了很多服务器级别,这些API绝大多数都被包装到了一个具名和核心模块中了,例如文件操作的 fs 核心模块 ,http服务构建的http 模块 path 路径操作模块 os 操作系统信息模块// 用来获取机器信息的var os = require('os')// 用来操作路径的var path = require('path')// 获取当前机器的 CPU 信息console.log(os.cpus._node模块中有很多核心模块,以下不属于核心模块,使用时需下载的是
数学建模【SPSS 下载-安装、方差分析与回归分析的SPSS实现(软件概述、方差分析、回归分析)】_化工数学模型数据回归软件-程序员宅基地
文章浏览阅读10w+次,点赞435次,收藏3.4k次。SPSS 22 下载安装过程7.6 方差分析与回归分析的SPSS实现7.6.1 SPSS软件概述1 SPSS版本与安装2 SPSS界面3 SPSS特点4 SPSS数据7.6.2 SPSS与方差分析1 单因素方差分析2 双因素方差分析7.6.3 SPSS与回归分析SPSS回归分析过程牙膏价格问题的回归分析_化工数学模型数据回归软件
利用hutool实现邮件发送功能_hutool发送邮件-程序员宅基地
文章浏览阅读7.5k次。如何利用hutool工具包实现邮件发送功能呢?1、首先引入hutool依赖<dependency> <groupId>cn.hutool</groupId> <artifactId>hutool-all</artifactId> <version>5.7.19</version></dependency>2、编写邮件发送工具类package com.pc.c..._hutool发送邮件
docker安装elasticsearch,elasticsearch-head,kibana,ik分词器_docker安装kibana连接elasticsearch并且elasticsearch有密码-程序员宅基地
文章浏览阅读867次,点赞2次,收藏2次。docker安装elasticsearch,elasticsearch-head,kibana,ik分词器安装方式基本有两种,一种是pull的方式,一种是Dockerfile的方式,由于pull的方式pull下来后还需配置许多东西且不便于复用,个人比较喜欢使用Dockerfile的方式所有docker支持的镜像基本都在https://hub.docker.com/docker的官网上能找到合..._docker安装kibana连接elasticsearch并且elasticsearch有密码
随便推点
Python 攻克移动开发失败!_beeware-程序员宅基地
文章浏览阅读1.3w次,点赞57次,收藏92次。整理 | 郑丽媛出品 | CSDN(ID:CSDNnews)近年来,随着机器学习的兴起,有一门编程语言逐渐变得火热——Python。得益于其针对机器学习提供了大量开源框架和第三方模块,内置..._beeware
Swift4.0_Timer 的基本使用_swift timer 暂停-程序员宅基地
文章浏览阅读7.9k次。//// ViewController.swift// Day_10_Timer//// Created by dongqiangfei on 2018/10/15.// Copyright 2018年 飞飞. All rights reserved.//import UIKitclass ViewController: UIViewController { ..._swift timer 暂停
元素三大等待-程序员宅基地
文章浏览阅读986次,点赞2次,收藏2次。1.硬性等待让当前线程暂停执行,应用场景:代码执行速度太快了,但是UI元素没有立马加载出来,造成两者不同步,这时候就可以让代码等待一下,再去执行找元素的动作线程休眠,强制等待 Thread.sleep(long mills)package com.example.demo;import org.junit.jupiter.api.Test;import org.openqa.selenium.By;import org.openqa.selenium.firefox.Firefox.._元素三大等待
Java软件工程师职位分析_java岗位分析-程序员宅基地
文章浏览阅读3k次,点赞4次,收藏14次。Java软件工程师职位分析_java岗位分析
Java:Unreachable code的解决方法_java unreachable code-程序员宅基地
文章浏览阅读2k次。Java:Unreachable code的解决方法_java unreachable code
标签data-*自定义属性值和根据data属性值查找对应标签_如何根据data-*属性获取对应的标签对象-程序员宅基地
文章浏览阅读1w次。1、html中设置标签data-*的值 标题 11111 222222、点击获取当前标签的data-url的值$('dd').on('click', function() { var urlVal = $(this).data('ur_如何根据data-*属性获取对应的标签对象