spring-boot整合consul随记-程序员宅基地
技术标签: consul
1.创建父项目。
首先创建一个maven项目,使用的spring-boot版本为2.3.5.RELEASE,对应的spring cloud版本为Hoxton.RELEASE。我们如果不知道该怎么选版本怎么办呢?可以参考如下版本选取的对照参表:
| Release Train | Spring Boot Generation |
|---|---|
| 2023.0.x aka Leyton | 3.2.x |
| 2022.0.x aka Kilburn | 3.0.x, 3.1.x (Starting with 2022.0.3) |
| 2021.0.x aka Jubilee | 2.6.x, 2.7.x (Starting with 2021.0.3) |
| 2020.0.x aka Ilford | 2.4.x, 2.5.x (Starting with 2020.0.3) |
| Hoxton | 2.2.x, 2.3.x (Starting with SR5) |
| Greenwich | 2.1.x |
| Finchley | 2.0.x |
| Edgware | 1.5.x |
| Dalston | 1.5.x |
确定好自己想要的版本后,父maven配置如下依赖。
<?xml version="1.0" encoding="UTF-8"?>

<project xmlns="http://maven.apache.org/POM/4.0.0" xmlns:xsi="http://www.w3.org/2001/XMLSchema-instance"
  xsi:schemaLocation="http://maven.apache.org/POM/4.0.0 http://maven.apache.org/xsd/maven-4.0.0.xsd">
  <modelVersion>4.0.0</modelVersion>

  <groupId>mydubbo</groupId>
  <artifactId>dubbo-parent</artifactId>
  <packaging>pom</packaging>
  <version>1.0-SNAPSHOT</version>
  <modules>
    <module>consul-dev</module>
  </modules>

  <name>dubbo-parent</name>


  <properties>
    <project.build.sourceEncoding>UTF-8</project.build.sourceEncoding>
    <java.version>11</java.version>
    <maven.compiler.source>11</maven.compiler.source>
    <maven.compiler.target>11</maven.compiler.target>
    <spring-cloud.version>Hoxton.RELEASE</spring-cloud.version>
    <apache-curator.version>5.2.0</apache-curator.version>
    <junit.version>3.8.1</junit.version>
  </properties>


  <parent>
    <groupId>org.springframework.boot</groupId>
    <artifactId>spring-boot-starter-parent</artifactId>
    <version>2.3.5.RELEASE</version>
    <relativePath/>
  </parent>

  <dependencyManagement>
    <dependencies>
      <!--spring boot的bom依赖,如果使用parent 那么就不需要在这里面用import导入了-->
      <!--<dependency>
        <groupId>org.springframework.boot</groupId>
        <artifactId>spring-boot-dependencies</artifactId>
        <version>${spring-boot.version}</version>
        <type>pom</type>
        <scope>import</scope>
      </dependency>-->

      <!--spring cloud的bom依赖,要和spring boot版本对应上才行-->
      <dependency>
        <groupId>org.springframework.cloud</groupId>
        <artifactId>spring-cloud-dependencies</artifactId>
        <version>${spring-cloud.version}</version>
        <type>pom</type>
        <scope>import</scope>
      </dependency>

    </dependencies>

  </dependencyManagement>


  <build>
    <pluginManagement>
      <plugins>
        <plugin>
          <groupId>org.springframework.boot</groupId>
          <artifactId>spring-boot-maven-plugin</artifactId>
          <version>3.2.3</version>
        </plugin>
      </plugins>
    </pluginManagement>
  </build>


</project>
2.创建子模块。
我们在这个父项目里创建一个子模块consul-dev,如果使用idea的话,就在父项目上,右键new module,完善模块信息后就创建出来了,模块会配置在上面<modules>标签中。

3.配置POM依赖。
在子模块的pom文件中引用依赖如下。
<?xml version="1.0" encoding="UTF-8"?>
<project xmlns="http://maven.apache.org/POM/4.0.0"
         xmlns:xsi="http://www.w3.org/2001/XMLSchema-instance"
         xsi:schemaLocation="http://maven.apache.org/POM/4.0.0 http://maven.apache.org/xsd/maven-4.0.0.xsd">
    <parent>
        <artifactId>dubbo-parent</artifactId>
        <groupId>mydubbo</groupId>
        <version>1.0-SNAPSHOT</version>
    </parent>
    <modelVersion>4.0.0</modelVersion>

    <artifactId>consul-dev</artifactId>


    <dependencies>
        <!--spring-boot-starter-actuator 是Spring Boot的一个Starter模块,它提供了一系列用于监控和管理Spring Boot应用的端点(endpoints),使得开发者可以方便地对运行中的应用进行健康检查、指标监控、审计跟踪、HTTP跟踪、环境信息查看、 Beans信息查看等操作。-->
        <dependency>
            <groupId>org.springframework.boot</groupId>
            <artifactId>spring-boot-starter-actuator</artifactId>
        </dependency>

        <!--spring boot,parent里的版本-->
        <dependency>
            <groupId>org.springframework.boot</groupId>
            <artifactId>spring-boot-starter</artifactId>
        </dependency>

        <!--consul 的监听服务,来源于spring cloud模块-->
        <dependency>
            <groupId>org.springframework.cloud</groupId>
            <artifactId>spring-cloud-starter-consul-discovery</artifactId>
        </dependency>
        <!--测试模块-->
        <dependency>
            <groupId>org.springframework.boot</groupId>
            <artifactId>spring-boot-starter-test</artifactId>
            <scope>test</scope>
        </dependency>
        <!--web模块-->
        <dependency>
            <groupId>org.springframework.boot</groupId>
            <artifactId>spring-boot-starter-web</artifactId>
        </dependency>

    </dependencies>


</project>
为啥上面没写版本号呢?因为我们依赖了父模块,在父模块中各组件版本已经定义好了。我们在这里引用了 spring-boot-starter-actuator健康监控模块,使用spring-boot-starter引入了spring boot(使用spring boot的starter相信你懂的,不懂的可以搜一下这个面试可能会问),引入了spring-cloud-starter-consul-discovery(这个是spring cloud的组件,用来注册consul服务注册发现),使用spring-boot-starter-web引入了web模块(为我们提供web功能)等,由此可见spring-boot还是很方便的,作为一个copy工程师,只要发现是有,想用啥拿来就用。
4.配置consul相关参数。
在子模块的resources中创建一个application.yml(或者application.properties)文件,配置如下:
spring:
  application:
    name: consul-dev #定义此服务名称
  cloud:
    consul:
      host: 124.223.114.XXX #consul注册地址
      port: 8500 #consul注册地址的端口,8500是默认端口
      discovery:
        enabled: true #启用服务发现
        instance-id: ${spring.application.name}-01 # 注册实例id(必须唯一)
        service-name: ${spring.application.name} # 引用上面的服务名称
        port: ${server.port} # 服务端口
        prefer-ip-address: true #是否使用ip地址注册
        ip-address: ${spring.cloud.client.ip-address} # 服务请求ip
        register: true #启用自动注册
        deregister: true #停服务自动取消注册
        health-check-url: http://XXXXXX.vicp.fun/actuator/health # 健康检查
        health-check-interval: 10s #健康检查时间10秒
        health-check-critical-timeout: 5s #健康超时时间5秒

server:
  port: 8080 #我们服务的端口地址
health-check-url: http://XXXXXX.vicp.fun/actuator/health # 为健康检查地址,这个会注册给consul告诉其健康检查的地址和时间间隔。我的consul是用docker部署在远程个人服务器上的,你们可以换成你自己的地址。

5.服务启动类。
import org.springframework.boot.SpringApplication;
import org.springframework.boot.autoconfigure.SpringBootApplication;
import org.springframework.cloud.client.discovery.EnableDiscoveryClient;

@SpringBootApplication
@EnableDiscoveryClient
public class DevConsul {
    public static void main(String[] args) {
        SpringApplication.run(DevConsul.class, args);
    }
}
使用此@EnableDiscoveryClient注解允许此项目进行服务注册。
6.自定义的web服务类
import org.springframework.web.bind.annotation.GetMapping;
import org.springframework.web.bind.annotation.RestController;

@RestController
public class TestControler {

    @GetMapping("/")
    public String home() {
        return "Hello World!";
    }
}
7.consul相关。
我的consul是用docker部署到Linux服务器上的,你自己测试的时候可以本地下载个windows版本的。下载地址:Install | Consul | HashiCorp Developer
我自己用的是latest最新版,你可以选择你喜欢的版本。
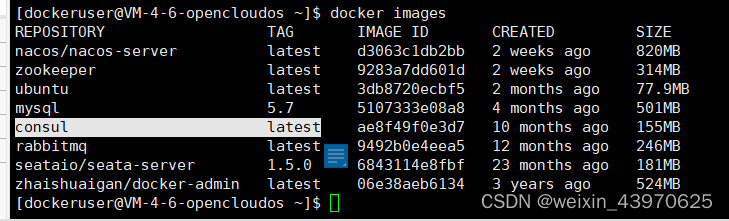
启动consul,然后再启动你的服务 ,就可以看到服务已经注册上了。如果你是测试环境且没用docker可以类似这样启动:consul agent -dev -client=0.0.0.0 -datacenter=mydc -node=myagent -ui -log-level=info -grpc -bind=192.168.1.100 -disable-host-node-id
-
consul agent: 启动Consul代理服务,它是Consul集群的核心组成部分,负责健康检查、KV存储、服务发现等功能。 -
-dev: 开启开发者模式(Development Mode)。在开发模式下,Consul会运行在一个单节点集群中,无需加入其他节点即可快速启动和测试Consul的功能,数据保存在内存中,不会持久化到磁盘,重启后数据会丢失。 -
-client=0.0.0.0: 设置Consul监听客户端请求的地址。这里设置为0.0.0.0表示Consul会在所有网络接口上监听客户端的HTTP和DNS请求。 -
-datacenter=mydc: 指定数据中心名称为mydc。在Consul中,数据center是用来组织节点的逻辑单元,同一数据中心内的节点之间可以直接通信。 -
-node=myagent: 指定当前Consul节点的名称为myagent。每个节点都需要一个唯一的名称以便于识别。 -
-ui: 开启内置的Web UI界面,允许用户通过浏览器访问Consul的可视化管理界面,默认监听8500端口。 -
-log-level=info: 设置日志级别为info。Consul的日志可以根据这个参数设定详细程度,info表示记录一般信息级别的日志。 -
-grpc: 启用gRPC支持。gRPC是Google开发的一种高性能、开源和通用的RPC框架,Consul使用gRPC来提供更高效的服务间通信。 -
-bind=192.168.1.100: 设置Consul代理绑定的IP地址,所有网络通信都会通过这个地址进行。在这里,Consul将通过192.168.1.100地址对外提供服务。 -
-disable-host-node-id: 禁止使用主机名作为节点ID。在默认情况下,Consul会尝试使用主机名和MAC地址生成一个唯一节点ID,这个选项禁止了这种行为,通常在需要手动指定节点ID时使用。

刚好对应上我们配置里的服务名和实例名。

8.结合feign进行远程调用。
我们可以再创建一个consul-test服务,通过open-feign用来调用consul-dev。那么open-feign和feign有啥区别呢?其实open-feign是feign的增强版本:
-
Spring Cloud 集成:
- Feign:最初是由 Netflix 开发的声明式 HTTP 客户端库,其本身并不直接支持 Spring Cloud 的全部特性。
- OpenFeign:是基于 Feign 的扩展版本,由 Spring Cloud 团队进行了专门的封装和增强,使得它可以无缝地与 Spring Cloud 生态系统集成,尤其是 Spring MVC 注解和 Spring Boot 配置。
-
注解支持:
- Feign:原生 Feign 支持自身的注解来描述服务调用接口,但不一定能直接识别和利用 Spring MVC 的注解,如
@RequestMapping等。 - OpenFeign:除了支持 Feign 自身的注解外,还支持 Spring MVC 标准注解,开发者可以直接使用这些注解来定义 RESTful API 调用,简化了开发流程。
- Feign:原生 Feign 支持自身的注解来描述服务调用接口,但不一定能直接识别和利用 Spring MVC 的注解,如
-
依赖管理与启动器:
- Feign:单独使用时,需要自行管理和配置相关的依赖,如 Ribbon 进行负载均衡。
- OpenFeign:作为 Spring Cloud 的一部分,提供了 spring-cloud-starter-openfeign 依赖启动器,方便在 Spring Boot 项目中快速引入和使用,且集成了 Ribbon 或者 Spring Cloud LoadBalancer 用于服务发现和负载均衡。
-
扩展性和配置:
- OpenFeign 提供了更丰富的配置选项,比如可以通过 Spring Boot 的配置文件轻松配置超时、重试等策略,并且可以更好地与 Spring Cloud 的其他组件如 Hystrix、Zuul、Eureka 等配合,实现服务熔断、路由等功能。
创建的新服务依赖如下:增加了spring-cloud-starter-openfeign(用来远程调用) 和 spring-cloud-starter-netflix-hystrix(断路器) 组件。
<?xml version="1.0" encoding="UTF-8"?>
<project xmlns="http://maven.apache.org/POM/4.0.0"
         xmlns:xsi="http://www.w3.org/2001/XMLSchema-instance"
         xsi:schemaLocation="http://maven.apache.org/POM/4.0.0 http://maven.apache.org/xsd/maven-4.0.0.xsd">
    <parent>
        <artifactId>dubbo-parent</artifactId>
        <groupId>mydubbo</groupId>
        <version>1.0-SNAPSHOT</version>
    </parent>
    <modelVersion>4.0.0</modelVersion>

    <artifactId>consul-test</artifactId>

    <dependencies>

        <!--spring-boot-starter-actuator 是Spring Boot的一个Starter模块,它提供了一系列用于监控和管理Spring Boot应用的端点(endpoints),使得开发者可以方便地对运行中的应用进行健康检查、指标监控、审计跟踪、HTTP跟踪、环境信息查看、 Beans信息查看等操作。-->
        <dependency>
            <groupId>org.springframework.boot</groupId>
            <artifactId>spring-boot-starter-actuator</artifactId>
        </dependency>

        <!--spring boot,parent里的版本-->
        <dependency>
            <groupId>org.springframework.boot</groupId>
            <artifactId>spring-boot-starter</artifactId>
        </dependency>

        <!--consul 的监听服务,来源于spring cloud模块-->
        <dependency>
            <groupId>org.springframework.cloud</groupId>
            <artifactId>spring-cloud-starter-consul-discovery</artifactId>
        </dependency>
        <!--测试模块-->
        <dependency>
            <groupId>org.springframework.boot</groupId>
            <artifactId>spring-boot-starter-test</artifactId>
            <scope>test</scope>
        </dependency>
        <!--web模块-->
        <dependency>
            <groupId>org.springframework.boot</groupId>
            <artifactId>spring-boot-starter-web</artifactId>
        </dependency>

        <dependency>
            <groupId>org.springframework.cloud</groupId>
            <artifactId>spring-cloud-starter-openfeign</artifactId>
        </dependency>

        <dependency>
            <groupId>org.springframework.cloud</groupId>
            <artifactId>spring-cloud-starter-netflix-hystrix</artifactId>
        </dependency>


    </dependencies>


</project>
添加如下yml配置,添加断路器并配置超时时间。
spring:
  application:
    name: consul-test
  #  profiles:
  #    active: dev
  cloud:
    consul:
      host: 124.223.114.XXX
      port: 8500
      discovery:
        enabled: true
        instance-id: ${spring.application.name}-01 # 注册实例id(必须唯一)
        service-name: ${spring.application.name} # 服务名称
        port: ${server.port} # 服务端口
        prefer-ip-address: true #是否使用ip地址注册
        ip-address: http://XXXXXXX1.goho.co # 服务请求ip
        register: true
        deregister: true
        health-check-url: http://XXXXXXX1.goho.co/demo/actuator/health # 健康检查
        health-check-interval: 10s
        health-check-critical-timeout: 5s

server:
  port: 8081
  servlet:
    context-path: /demo

# 熔断器
feign:
  hystrix:
    enabled: true
  httpclient:
    connection-timeout: 3000
主启动类增加两个注解@EnableCircuitBreaker (启用断路器)和@EnableFeignClients(启用feign)。
import org.springframework.boot.SpringApplication;
import org.springframework.boot.autoconfigure.SpringBootApplication;
import org.springframework.cloud.client.circuitbreaker.EnableCircuitBreaker;
import org.springframework.cloud.client.discovery.EnableDiscoveryClient;
import org.springframework.cloud.openfeign.EnableFeignClients;

@SpringBootApplication
@EnableDiscoveryClient
@EnableCircuitBreaker
@EnableFeignClients(basePackages = {"com.test.api"})
public class TestConsul {
    public static void main(String[] args) {
        SpringApplication.run(TestConsul.class, args);
    }
}
定义一个接口,设置feign要访问的服务名和url(如果在你配了正确的host地址映射的情况下,url不必需),添加一个失败兜底的类TestFallbackOne。
import com.test.fallback.TestFallbackOne;
import org.springframework.cloud.openfeign.FeignClient;
import org.springframework.web.bind.annotation.GetMapping;
import org.springframework.web.bind.annotation.PathVariable;

@FeignClient(value = "consul-dev",
        url="http://XXXXX.vicp.fun",fallback = TestFallbackOne.class ) // 替换为在Eureka或Consul等注册中心注册的服务名
public interface DemoService {
    @GetMapping("/sayHello/{name}")
    String sayHello(@PathVariable("name") String name);

}
@Component
public class TestFallbackOne implements DemoService {
@Override
public String sayHello(String name) {
return name + "熔断了";
}
}
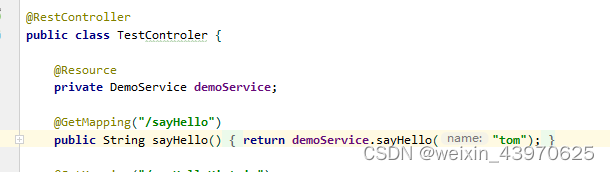
在consul-dev服务里增加相应的controller和DemoService接口,注意了这里的DemoService要和consul-test的DemoService要访问的方法保持一致,当然也可以把它俩的接口抽出来单独放在一个模块里维护,这样开发着更方便。
@RestController
public class TestControler {

    @Resource
    private DemoService demoService;

    @GetMapping("/sayHello/{name}")
    public String sayHello(@PathVariable("name") String name) {
        return demoService.sayHello(name);
    }

}
public interface DemoService {
String sayHello(String name);
}启动测试。
在服务提供方consul-dev,打个断点,模仿服务未响应。

这时请求服务消费方,发现服务熔断了。

9.负载均衡
在 Spring Cloud 中,@FeignClient 默认使用 Ribbon 作为客户端负载均衡器,但 Ribbon 的具体负载均衡策略是通过 Ribbon 的配置来实现的,而不是直接在 @FeignClient 注解中定义。不过,可以通过全局配置或者自定义 Ribbon 客户端的方式来改变负载均衡策略。
例如,要更改 Ribbon 的负载均衡策略为轮询(默认也是轮询),可以在配置文件中定义:
ribbon:
  NFLoadBalancerRuleClassName: com.netflix.loadbalancer.RoundRobinRule
从 Spring Cloud Finchley 版本开始,还可以通过 @Configuration 类来自定义 Ribbon 客户端并设置负载均衡策略:
@Configuration
public class RibbonConfig {

    @Bean
    public IRule ribbonRule() {
        return new RandomRule(); // 使用随机策略
    }
}
不过从 Spring Cloud 2020.0.0(Ilford)版本开始,Ribbon 不再作为默认的负载均衡器,而是推荐使用 Spring Cloud LoadBalancer。在 Spring Cloud LoadBalancer 中,可以通过 LoadBalancerClientConfigurationProperties 设置负载均衡策略,或者自定义 org.springframework.cloud.loadbalancer.core.RoundRobinLoadBalancer、RandomLoadBalancer 等实现类来实现不同的策略。
例如,使用 Spring Cloud LoadBalancer 时,若要全局配置为随机策略,可以在配置文件中写入:
spring:
  cloud:
    loadbalancer:
      ribbon:
        enabled: true # 启用 Ribbon 作为底层负载均衡器
      default-load-balancer:
        rule: random # 设置默认负载均衡规则为随机
最后记录一下consul配置相关:
consul下文件相关:
/etc/consul.d/consul.env: 这个文件通常用于设置 Consul 运行时的环境变量。环境变量可以影响 Consul 的行为,例如设置日志级别、数据目录路径等。在这个文件中,你可以配置一些 Consul 运行时所需的环境变量。
/etc/consul.d/consul.hcl: 这是 Consul 的主要配置文件。在这个文件中,你可以配置 Consul 的各种选项,包括集群配置、数据中心、节点名称、绑定地址、广告地址、加入集群的地址、监听端口、日志设置等。通过编辑这个文件,你可以定制 Consul 的行为和功能。
/usr/bin/consul: 这是 Consul 的可执行文件。通过执行这个文件,你可以启动 Consul Agent,并根据配置文件中的设置来运行 Consul。
/usr/lib/systemd/system/consul.service: 这是 Consul 的 Systemd 服务单元文件。它定义了 Consul 作为 Systemd 服务的配置,包括服务的启动方式、依赖关系等。通过 Systemd,你可以使用 systemctl 命令来管理 Consul 服务的启动、停止、重启等操作。
# Consul 配置文件

# 数据中心设置
datacenter = "dc1"

# 节点名称设置(注意:不可重名)
node_name = "consul-36"

# 数据目录设置
data_dir = "/opt/consul"

# 日志级别设置(可选值:TRACE, DEBUG, INFO, WARN, ERR)
log_level = "ERR"

# 绑定地址设置(监听所有 IPv6 地址和所有 IPv4 地址)
bind_addr = "[::]"
bind_addr = "0.0.0.0"

# 广播自己地址给集群访问(用于集群内部通信)
advertise_addr = "192.168.0.36"

# 加入集群的地址列表(需要提供至少一个已知的集群节点地址,:8301默认端口可省略)
retry_join = ["192.168.0.122:8301", "192.168.0.123", "192.168.0.124"]
# 用于指定 Consul Agent 在启动时尝试通过加入集群节点。
start_join = ["192.168.0.122", "192.168.0.123", "192.168.0.124"]

# 服务节点设置(是否为服务器节点)
server = true
# 这会告诉Consul在引导期间等待2个服务器节点就绪,然后再引导整个集群。
bootstrap_expect = 2

# 加密设置(consul keygen 生成的用于集群网络通信的加密)
encrypt = ""

# 客户端地址设置(用于监听客户端请求的地址)
client_addr = "0.0.0.0"

# UI 配置(用于启用内置的 Web UI)
ui_config {
  enabled = true
  content_path = "/ui/" #可自定义路径
}

# 默认端口设置
ports {
  # HTTP API 端口(默认值:8500)与 Consul 进行交互,包括服务注册、UI、健康检查等
  http = 8500
  # DNS 端口(默认值:8600)用于提供 DNS 查询服务,允许客户端通过 DNS 协议来查询服务实例的地址
  dns = 8600
  # Serf LAN 端口(默认值:8301)局域网内进行集群节点间的通信
  serf_lan = 8301
  # Serf WAN 端口(默认值:8302) 广域网(WAN)内进行集群节点间的通信,用于跨数据中心的通信
  serf_wan = 8302
  # 服务器 RPC 端口(默认值:8300)服务器节点之间进行 RPC 通信
  server = 8300
}
# 启动
consul agent -config-file=/etc/consul.d
以下是一些常用的 Consul 集群管理命令:
启动 Consul Agent:consul agent -config-file=<config_file>
这个命令用于启动 Consul Agent,并指定配置文件。
加入集群:consul join <address>
这个命令用于将当前节点加入到 Consul 集群中,<address> 是一个已存在的集群节点的地址。
离开集群:consul leave
这个命令用于将当前节点从 Consul 集群中移除。
查看集群节点:consul members
这个命令用于查看当前 Consul 集群中的成员节点列表。
查看 Leader:consul operator raft list-peers
这个命令用于列出当前的 Consul 集群中的领导者节点。
手动推选 Leader:consul operator raft promote <node_id>
这个命令用于手动推选指定节点为 Consul 集群的领导者。
重启集群节点:consul reload
这个命令用于重新加载 Consul 配置文件并重启 Consul Agent。
查看服务列表:consul catalog services
这个命令用于列出所有在 Consul 中注册的服务。
注册服务:consul services register <service.json>
这个命令用于注册一个新的服务到 Consul 中,<service.json> 是包含服务定义的 JSON 文件。
移除服务:consul services deregister <service_id>
这个命令用于从 Consul 中移除一个已注册的服务,<service_id> 是服务的唯一标识符。
智能推荐
利用C语言标准库生成一个真随机数的方法_c 真随机数-程序员宅基地
文章浏览阅读7.6k次。 首先需要明确一点的是,计算机系统中生成一个随机数,需要依赖一个随机量,这个随机量称为随机数种子。否则生成的就是伪随机数。随机数种子的值越多样化,生成的数就越随机。通常,随机数种子从计算机系统外部引入,例如人的操作、ADC采集到的值等。 C语言的标准库,提供了srand()和rand()两个函数用于产生随机数。下面的例程提供了生成一个指定范围的随机数的方法:#..._c 真随机数
怎么才能用SPSS按条件选择数据?_spss如何按条件分类-程序员宅基地
文章浏览阅读1.4w次,点赞4次,收藏41次。我们在进行数据分析的时候,并不是所有的数据都需要进行分析。这就要求我们要对数据进行按条件选择。本文我将用IBM SPSS Statistics演示如何进行按条件筛选数据。1、打开数据如图所示,是一个学生个人信息的数据集。我将在此基础上演示如何筛选出语文成绩大于78的学生。图1:数据展示2、菜单位置如图所示,第一步我们点击菜单栏中的“数据”按钮,第二步选择下级菜单中的“选择个案”。图2:菜单位置3、选择条件如图所示,我们先选中语文成绩,在点击“如果条件满足”.._spss如何按条件分类
离散数学程序实践——差集——c_用c++实现离散数学差运算-程序员宅基地
文章浏览阅读591次。//集合的差集程序实现#include<stdio.h>//降序排序数组void sort( int a[],int n ){ int i,j,k,temp; for( i=0;i<n-1;i++ ){ k=i; for( j=i+1;j<n;j++ ){ if( a[j]>a[k] ) k=j; } if( k!=i ){ temp=a[k]; a[k]=a[i]; a[i]=temp; } }}//计算差集._用c++实现离散数学差运算
python正则表达式-程序员宅基地
文章浏览阅读524次,点赞14次,收藏14次。ndex-editionrecommend 如果没有今天,明天会不会有昨天?[瑞士]伊夫·博萨尔特(YvesBossart) 2017-1。
CentOS操作系统防火墙添加例外端口_centos7域控服务器里防火墙需要例外那些端口-程序员宅基地
文章浏览阅读1w次。CentOS6与CentOS7添加防火墙例外端口的命令不同,需单独来说:(1)CentOS6下添加防火墙例外端口#vim/ets/sysconfig/iptables在 -A INPUT -m state--state NEW -m tcp -p tcp --dport 22 -j ACCEPT一行的后台添加类似的一行命令即可,如 # Firewall configura..._centos7域控服务器里防火墙需要例外那些端口
数据结构|数组为什么这么快?-程序员宅基地
文章浏览阅读2.9k次,点赞8次,收藏10次。我相信在很多地方,大家在进行数据结构的比较的时候,说到数组,第一反应就是—快,但是为什么快呢?数组到底快在哪里呢?不知道大家是否有思考过这个问题,这篇文章,我就讲讲我对数组的一些看法,抛砖引玉,希望大家多多交流!文章目录数组到底哪里快?查找快吗?为什么数组能支持随机访问呢?答案:举例分析:我们要分析的第一个问题是:数组到底哪里快?查找快吗?可能有的同学第一反应利用数组进行查找的话,时间...
随便推点
后台密码加盐存储 pwd+salt sha256(),java实现_pwdsalt-程序员宅基地
文章浏览阅读4.7k次。后台仅仅使用md5或者 sha256对密码加密后存储在一定程度上存在被撞库风险。这时候考虑使用随机生成salt进行密码加盐。前后台注册基本逻辑:前端传入md5过的密码pmd5-》后台接受,并随机生成salt -》后台使用sha256(salt+pmd5) 生成最终密码pwd 。-》后台在数据库存储字段为 salt、pwd 。代码实现:创建如下工具类PasswordU..._pwdsalt
bugfree安装时,提示MySQL未安装_bugfree 显示mysql未安装-程序员宅基地
文章浏览阅读371次。1.解决办法:安装低版本的XAMPP(<7.0版本)2.遇到的问题:安装bugfree,我先安装了XAMPP来搭建环境,但是XAMPP7.0+版本安装成功了,但是后面到了安装bugfree时,输入了http://localhost/bugfree/install,后出现了检测到未安装MySQL数据库,打了一个红色叉子。3.解决过程:我尝试了各种版本的XAMPP和bugfree版本,发现,只要是XAMPP的版本太高,比如是7.0+的,b..._bugfree 显示mysql未安装
Delphi调用Excel设置单元格的格式 _delphi excelapp.worksheets[j].columns[2].numberfor-程序员宅基地
文章浏览阅读1w次。在做设计过程中,需要把数据内容导入到Excel中,可是每次导入EXcel之后,总有一些数据不能正常显示,比如'123456789012'显示为科学技术形式'1.23457E+11’,还有以'0’开头的数据总会把0撇开再显示。在VB中好像这么更改Excel更改单元格式:Worksheets("Sheet1").Range("A17").NumberFormat = "General" //对A17 单元格格式进行设置Worksheets("S_delphi excelapp.worksheets[j].columns[2].numberformatlocal
php的错误和异常处理机制_php exception输出错误行-程序员宅基地
文章浏览阅读2.5k次。php的错误和异常处理机制。1、php错误分类;2、error_reporting、display_errors、log_errors、log_errors_max_len、error_log等配置;3、set_error_handler的使用;4、set_exception_handler 的使用;5、用trigger_error触发错误;6、捕获异常try/catch/finally的使用方式_php exception输出错误行
Java 中应用Dijkstra算法求解最短路径_路由最短路径代码java-程序员宅基地
文章浏览阅读476次。Dijkstra算法是一个经典的解决最短路径问题的算法,在路由算法、导航系统等领域都有广泛的应用。它通过逐步选择距离起始节点最近的节点,并更新其邻接节点的最短距离,最终得到起始节点到其他所有节点的最短路径。然后,在一个循环中,每次选择距离最小且未加入最短路径集合的节点,将其加入最短路径集合,并更新其邻接节点的最短路径长度。它遍历所有未加入最短路径集合(shortestPathTreeSet)的节点,查找距离最小且未加入最短路径集合的节点,并返回其索引。数组来追踪起始节点到其他节点的最短路径长度,_路由最短路径代码java
Mybatis-plus解决selectOne查询多个会报错的问题_mybatisplus selectone-程序员宅基地
文章浏览阅读2w次,点赞13次,收藏36次。123_mybatisplus selectone