springcloud父子工程的构建和组件的使用-----springcloud全课程总结_spring cloud父项目的明明规则-程序员宅基地
技术标签: springcloud
1.新建父工程


下一步是可选择的用quickstart,但是实际用的是下面的这种方式创建的。

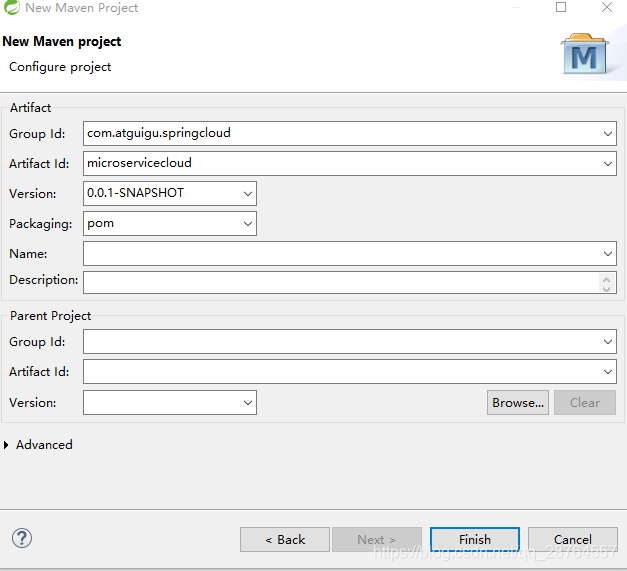
开始这个一定要选pom工程。
粘贴pom的文件:
 gav坐标注意这个坐标是十分重要的。
 常用的
常用的
pom总结:
<project xmlns="http://maven.apache.org/POM/4.0.0" xmlns:xsi="http://www.w3.org/2001/XMLSchema-instance"
         xsi:schemaLocation="http://maven.apache.org/POM/4.0.0 http://maven.apache.org/xsd/maven-4.0.0.xsd">
    <modelVersion>4.0.0</modelVersion>

    <groupId>com.atguigu.springcloud</groupId>
    <artifactId>microservicecloud</artifactId>
    <version>0.0.1-SNAPSHOT</version>
    <packaging>pom</packaging>


    <properties>
        <project.build.sourceEncoding>UTF-8</project.build.sourceEncoding>
        <!--保证编译的是java8版本-->
        <maven.compiler.source>1.8</maven.compiler.source>
        <maven.compiler.target>1.8</maven.compiler.target>
        <junit.version>4.12</junit.version>
        <log4j.version>1.2.17</log4j.version>
        <lombok.version>1.16.18</lombok.version>
    </properties>

    <dependencyManagement>
        <dependencies>
             <!-- springcloud -->
            <dependency>
                <groupId>org.springframework.cloud</groupId>
                <artifactId>spring-cloud-dependencies</artifactId>
                <version>Dalston.SR1</version>
                <type>pom</type>
                <scope>import</scope>
            </dependency>
            <!-- springboot -->
            <dependency>
                <groupId>org.springframework.boot</groupId>
                <artifactId>spring-boot-dependencies</artifactId>
                <version>1.5.9.RELEASE</version>
                <type>pom</type>
                <scope>import</scope>
            </dependency>
            <dependency>
                <groupId>mysql</groupId>
                <artifactId>mysql-connector-java</artifactId>
                <version>5.1.46</version>
            </dependency>
            <dependency>
                <groupId>com.alibaba</groupId>
                <artifactId>druid</artifactId>
                <version>1.0.31</version>
            </dependency>
            <dependency>
                <groupId>org.mybatis.spring.boot</groupId>
                <artifactId>mybatis-spring-boot-starter</artifactId>
                <version>1.3.0</version>
            </dependency>
            <dependency>
                <groupId>ch.qos.logback</groupId>
                <artifactId>logback-core</artifactId>
                <version>1.2.3</version>
            </dependency>
            <dependency>
                <groupId>junit</groupId>
                <artifactId>junit</artifactId>
                <version>${junit.version}</version>
                <scope>test</scope>
            </dependency>
            <!-- 可以引入上面的版本 -->
            <dependency>
                <groupId>log4j</groupId>
                <artifactId>log4j</artifactId>
                <version>${log4j.version}</version>
            </dependency>
        </dependencies>
    </dependencyManagement>

    <build>
        <finalName>microservicecloud</finalName>
        <resources>
            <resource>
                <directory>src/main/resources</directory>
                <filtering>true</filtering>
            </resource>
        </resources>
        <plugins>
            <plugin>
                <groupId>org.apache.maven.plugins</groupId>
                <artifactId>maven-resources-plugin</artifactId>
                <configuration>
                    <delimiters>
                        <delimit>$</delimit>
                    </delimiters>
                </configuration>
            </plugin>
        </plugins>
    </build>


    <!-- 新建子工程会自动生成的 -->
    <modules>
        <module>microservicecloud-api</module>
        <module>microservicecloud-provider-dept-8001</module>
        <module>microservicecloud-consumer-dept-80</module>
        <module>microservicecloud-eureka-7001</module>
        <module>microservicecloud-eureka-7002</module>
        <module>microservicecloud-eureka-7003</module>
        <module>microservicecloud-provider-dept-8002</module>
        <module>microservicecloud-provider-dept-8003</module>
        <module>microservicecloud-consumer-dept-feign</module>
    </modules>

</project>
------------------------------------------------------------------
2.新建第一个子工程


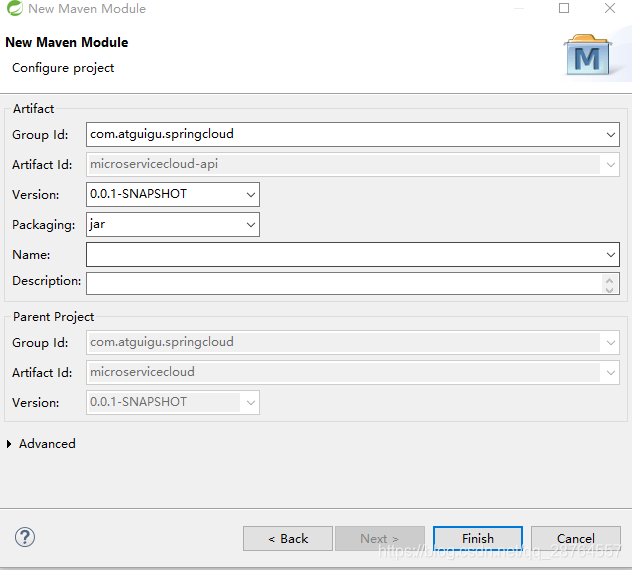
注意观察父工程的pom文件

<project xmlns="http://maven.apache.org/POM/4.0.0" xmlns:xsi="http://www.w3.org/2001/XMLSchema-instance"
         xsi:schemaLocation="http://maven.apache.org/POM/4.0.0 http://maven.apache.org/xsd/maven-4.0.0.xsd">
    <modelVersion>4.0.0</modelVersion>

    <parent><!-- 子类里面显示声明才能有明确的继承表现,无意外就是父类的默认版本否则自己定义 -->
        <groupId>com.atguigu.springcloud</groupId>
        <artifactId>microservicecloud</artifactId>
        <version>0.0.1-SNAPSHOT</version>
    </parent>

    <artifactId>microservicecloud-api</artifactId><!-- 当前Module我自己叫什么名字 -->

    <dependencies><!-- 当前Module需要用到的jar包,按自己需求添加,如果父类已经包含了,可以不用写版本号 -->
        <dependency>
            <groupId>org.projectlombok</groupId>
            <artifactId>lombok</artifactId>
        </dependency>
    </dependencies>
</project>

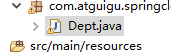
具体建立类。
package com.atguigu.springcloud.entities;

import java.io.Serializable;

import lombok.AllArgsConstructor;
import lombok.Data;
import lombok.Getter;
import lombok.NoArgsConstructor;
import lombok.Setter;
import lombok.experimental.Accessors;


@NoArgsConstructor
//@AllArgsConstructor
@Data
@Accessors(chain=true)
public class Dept implements Serializable// entity --orm--- db_table
{
	private Long 	deptno; // 主键
	private String 	dname; // 部门名称
	private String 	db_source;// 来自那个数据库,因为微服务架构可以一个服务对应一个数据库,同一个信息被存储到不同数据库

	public Dept(String dname)
	{
		super();
		this.dname = dname;
	}


}
注意一点必须序列化。
构建完成Dept公共模块。

重新在本地生成最新的jar包
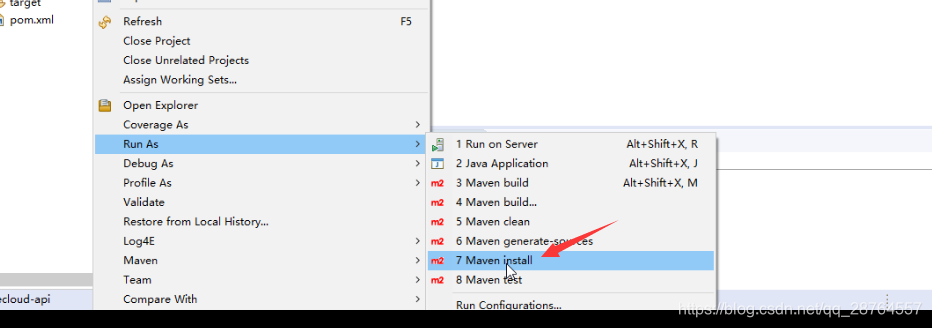
这样就在本地具备了最新的jar包
这样别的模块要想使用的话拿到gav坐标即可,注意这个jar包要保证别的工程可以引用到的。
 <groupId>com.atguigu.springcloud</groupId>
 <artifactId>microservicecloud-api</artifactId>
 <version>0.0.1-SNAPSHOT</version>
---------------------------------17-------以上就是新建api实体类-------------------------
构建微服务的提供者:(这里有完整的mvc单独就是一个springmvc工程)
注意这个微服务的提供者引入了api的包:
<dependency>
			<groupId>com.atguigu.springcloud</groupId>
			<artifactId>microservicecloud-api</artifactId>
			<version>${project.version}</version>
		</dependency>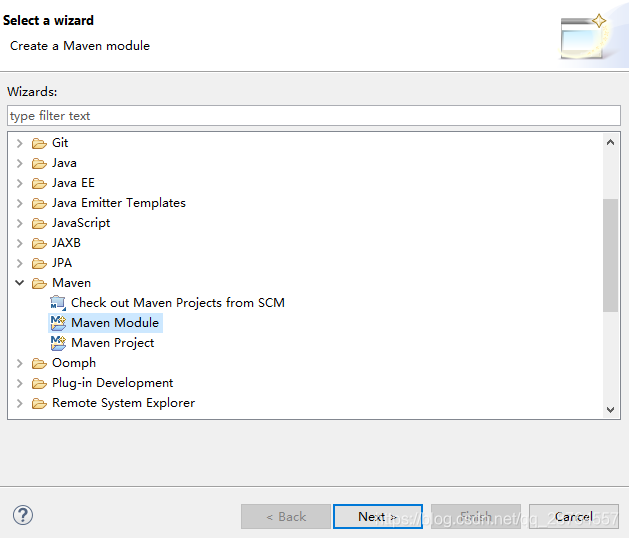

注意下一步也是jar包。

看父工程的变化

逐个说下配置文件的内容。
<!-- 引入自己定义的api通用包,可以使用Dept部门Entity -->
        <dependency>
            <groupId>com.atguigu.springcloud</groupId>
            <artifactId>microservicecloud-api</artifactId>
            <version>${project.version}</version>
        </dependency>
首先这个是之前在本地maven仓库里面的jar,直接引用即可。看下pm工程配置了什么?
<project xmlns="http://maven.apache.org/POM/4.0.0" xmlns:xsi="http://www.w3.org/2001/XMLSchema-instance"
         xsi:schemaLocation="http://maven.apache.org/POM/4.0.0 http://maven.apache.org/xsd/maven-4.0.0.xsd">
    <modelVersion>4.0.0</modelVersion>

    <parent>
        <groupId>com.atguigu.springcloud</groupId>
        <artifactId>microservicecloud</artifactId>
        <version>0.0.1-SNAPSHOT</version>
    </parent>

    <artifactId>microservicecloud-provider-dept-8001</artifactId>

    <dependencies>
        <!-- 引入自己定义的api通用包,可以使用Dept部门Entity -->
        <dependency>
            <groupId>com.atguigu.springcloud</groupId>
            <artifactId>microservicecloud-api</artifactId>
            <version>${project.version}</version>
        </dependency>
        <!-- 测试类 -->
        <dependency>
            <groupId>junit</groupId>
            <artifactId>junit</artifactId>
        </dependency>
        <!-- mysql的连接驱动 -->
        <dependency>
            <groupId>mysql</groupId>
            <artifactId>mysql-connector-java</artifactId>
        </dependency>
        <!-- druid -->
        <dependency>
            <groupId>com.alibaba</groupId>
            <artifactId>druid</artifactId>
        </dependency>
        <!-- 日志-->
        <dependency>
            <groupId>ch.qos.logback</groupId>
            <artifactId>logback-core</artifactId>
        </dependency>
        <dependency>
            <groupId>org.mybatis.spring.boot</groupId>
            <artifactId>mybatis-spring-boot-starter</artifactId>
        </dependency>
        <dependency>
            <groupId>org.springframework.boot</groupId>
            <artifactId>spring-boot-starter-jetty</artifactId>
        </dependency>
        <dependency>
            <groupId>org.springframework.boot</groupId>
            <artifactId>spring-boot-starter-web</artifactId>
        </dependency>
        <dependency>
            <groupId>org.springframework.boot</groupId>
            <artifactId>spring-boot-starter-test</artifactId>
        </dependency>
        <!-- 修改后立即生效,热部署 -->
        <dependency>
            <groupId>org.springframework</groupId>
            <artifactId>springloaded</artifactId>
        </dependency>
        <dependency>
            <groupId>org.springframework.boot</groupId>
            <artifactId>spring-boot-devtools</artifactId>
        </dependency>
    </dependencies>

</project>
yml配置文件的相关安装和编写
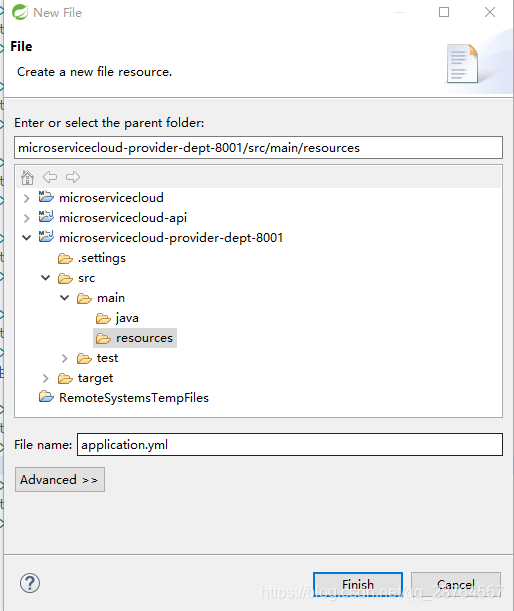
写配置文件
server:
  port: 8001

mybatis:
  config-location: classpath:mybatis/mybatis.cfg.xml        # mybatis配置文件所在路径
  type-aliases-package: com.atguigu.springcloud.entities    # 所有Entity别名类所在包,告诉mybatis,扫描这个包的实体类
  mapper-locations:
  - classpath:mybatis/mapper/**/*.xml                       # mapper映射文件,写sql的

spring:
   application:
    name: microservicecloud-dept                            #微服务的名字
   datasource:
    type: com.alibaba.druid.pool.DruidDataSource            # 当前数据源操作类型
    driver-class-name: org.gjt.mm.mysql.Driver              # mysql驱动包
    url: jdbc:mysql://192.168.244.130:3306/cloudDB01              # 数据库名称
    username: root
    password: 123456
    dbcp2:
      min-idle: 5                                           # 数据库连接池的最小维持连接数
      initial-size: 5                                       # 初始化连接数
      max-total: 5                                          # 最大连接数
      max-wait-millis: 200                                  # 等待连接获取的最大超时时间
mybatis的三个配置一定要清楚的:
1.config-location: classpath:mybatis/mybatis.cfg.xml 这个基本没啥用可以补充些配置比如开启二级缓存。
2.type-aliases-package: com.atguigu.springcloud.entities 扫描这个包的实体类。
3. mapper-locations:
- classpath:mybatis/mapper/**/*.xml mapper映射文件写sql的上一步告诉实体类在哪里了。
1.新建mybatis文件夹和mybatis.cfg.xml,这个在springboot文件中写在yml中了。
 配置mybatis本身。
<?xml version="1.0" encoding="UTF-8" ?>
<!DOCTYPE configuration
  PUBLIC "-//mybatis.org//DTD Config 3.0//EN"
  "http://mybatis.org/dtd/mybatis-3-config.dtd">

<configuration>

	<settings>
		<setting name="cacheEnabled" value="true" /><!-- 二级缓存开启 -->
	</settings>

</configuration>
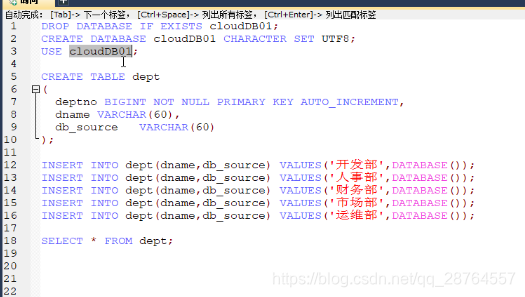
创建数据库

写DAO,注意DAO有@Mapper
package com.atguigu.springcloud.dao;

import java.util.List;

import org.apache.ibatis.annotations.Mapper;

import com.atguigu.springcloud.entities.Dept;

@Mapper//这个不要忘记
public interface DeptDao
{
	public boolean addDept(Dept dept);

	public Dept findById(Long id);

	public List<Dept> findAll();
}
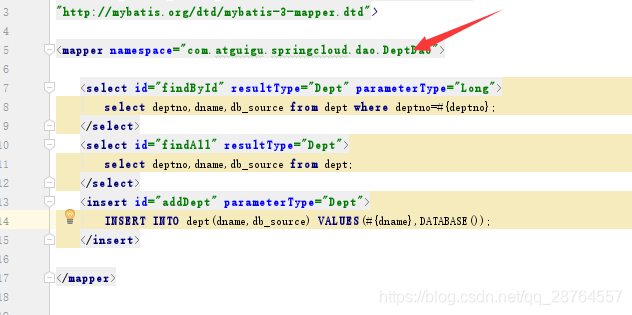
写mapper.xml实现方法

<?xml version="1.0" encoding="UTF-8" ?>
<!DOCTYPE mapper PUBLIC "-//mybatis.org//DTD Mapper 3.0//EN"
"http://mybatis.org/dtd/mybatis-3-mapper.dtd">

<mapper namespace="com.atguigu.springcloud.dao.DeptDao">

	<select id="findById" resultType="Dept" parameterType="Long">
		select deptno,dname,db_source from dept where deptno=#{deptno};
	</select>
	<select id="findAll" resultType="Dept">
		select deptno,dname,db_source from dept;
	</select>
	<insert id="addDept" parameterType="Dept">
		INSERT INTO dept(dname,db_source) VALUES(#{dname},DATABASE());
	</insert>

</mapper>
构建service层的:
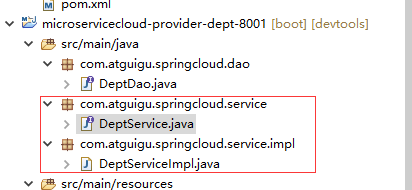
注意在service的实现类里面调用用@service注解
package com.atguigu.springcloud.service;

import java.util.List;

import com.atguigu.springcloud.entities.Dept;

public interface DeptService
{
	public boolean add(Dept dept);

	public Dept get(Long id);

	public List<Dept> list();
}
package com.atguigu.springcloud.service.impl;

import java.util.List;

import org.springframework.beans.factory.annotation.Autowired;
import org.springframework.stereotype.Service;

import com.atguigu.springcloud.dao.DeptDao;
import com.atguigu.springcloud.entities.Dept;
import com.atguigu.springcloud.service.DeptService;

@Service
public class DeptServiceImpl implements DeptService
{
	@Autowired
	private DeptDao dao;

	@Override
	public boolean add(Dept dept)
	{
		return dao.addDept(dept);
	}

	@Override
	public Dept get(Long id)
	{
		return dao.findById(id);
	}

	@Override
	public List<Dept> list()
	{
		return dao.findAll();
	}

}
写controller层
package com.atguigu.springcloud.controller;

import java.util.List;

import org.springframework.beans.factory.annotation.Autowired;
import org.springframework.web.bind.annotation.PathVariable;
import org.springframework.web.bind.annotation.RequestBody;
import org.springframework.web.bind.annotation.RequestMapping;
import org.springframework.web.bind.annotation.RequestMethod;
import org.springframework.web.bind.annotation.RestController;

import com.atguigu.springcloud.entities.Dept;
import com.atguigu.springcloud.service.DeptService;

@RestController
public class DeptController
{
	@Autowired
	private DeptService service;


	@RequestMapping(value = "/dept/add", method = RequestMethod.POST)
	public boolean add(@RequestBody Dept dept)
	{
		return service.add(dept);
	}

	@RequestMapping(value = "/dept/get/{id}", method = RequestMethod.GET)
	public Dept get(@PathVariable("id") Long id)
	{
		return service.get(id);
	}

	@RequestMapping(value = "/dept/list", method = RequestMethod.GET)
	public List<Dept> list()
	{
		return service.list();
	}


}
几点注意下:
1.前后端分离的架构@restController 这个是十分重要的
2.细粒度化的@PostMapping @GetMapping
3.参数的注解@PathVariable @RequestBody 注意这个注解的用法
最后:主启动类
 目录结构
目录结构
package com.atguigu.springcloud;

import org.springframework.boot.SpringApplication;
import org.springframework.boot.autoconfigure.SpringBootApplication;

@SpringBootApplication
public class DeptProvider8001_App
{
	public static void main(String[] args)
	{
		SpringApplication.run(DeptProvider8001_App.class, args);
	}
}
启动。

访问:
 localhost:8001/dept/list
总结:mybatis的路径三要素 配置文件 .xml 实体类
------------------------------18-------服务的提供者和api实体类-----------此处主要写了普通的mvc--------------
构建微服务的消费者


<project xmlns="http://maven.apache.org/POM/4.0.0" xmlns:xsi="http://www.w3.org/2001/XMLSchema-instance"
         xsi:schemaLocation="http://maven.apache.org/POM/4.0.0 http://maven.apache.org/xsd/maven-4.0.0.xsd">
    <modelVersion>4.0.0</modelVersion>

    <parent>
        <groupId>com.atguigu.springcloud</groupId>
        <artifactId>microservicecloud</artifactId>
        <version>0.0.1-SNAPSHOT</version>
    </parent>

    <artifactId>microservicecloud-consumer-dept-80</artifactId>
    <description>部门微服务消费者</description>

    <dependencies>
        <dependency><!-- 自己定义的api -->
            <groupId>com.atguigu.springcloud</groupId>
            <artifactId>microservicecloud-api</artifactId>
            <version>${project.version}</version>
        </dependency>
        <dependency>
            <groupId>org.springframework.boot</groupId>
            <artifactId>spring-boot-starter-web</artifactId>
        </dependency>
        <!-- 修改后立即生效,热部署 -->
        <dependency>
            <groupId>org.springframework</groupId>
            <artifactId>springloaded</artifactId>
        </dependency>
        <dependency>
            <groupId>org.springframework.boot</groupId>
            <artifactId>spring-boot-devtools</artifactId>
        </dependency>
    </dependencies>


</project>
yaml文件
server:
  port: 80
新建配置类。
package com.atguigu.springcloud.cfgbeans;


import org.springframework.context.annotation.Bean;
import org.springframework.context.annotation.Configuration;
import org.springframework.web.client.RestTemplate;


@Configuration
public class ConfigBean //boot -->spring   applicationContext.xml --- @Configuration配置   ConfigBean = applicationContext.xml
{
	@Bean
	public RestTemplate getRestTemplate()
	{
		return new RestTemplate();
	}
}

//@Bean
//public UserServcie getUserServcie()
//{
//	return new UserServcieImpl();
//}
//applicationContext.xml == ConfigBean(@Configuration)
//<bean id="userServcie" class="com.atguigu.tmall.UserServiceImpl">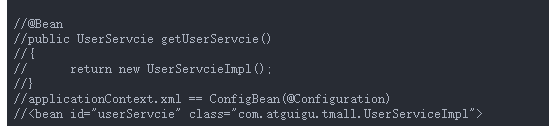
写controller此时有新的东西了。消费者没有service层。

官网

写controller。
package com.atguigu.springcloud.controller;

import java.util.List;

import org.springframework.beans.factory.annotation.Autowired;
import org.springframework.web.bind.annotation.PathVariable;
import org.springframework.web.bind.annotation.RequestMapping;
import org.springframework.web.bind.annotation.RestController;
import org.springframework.web.client.RestTemplate;
//这个过程并没有但是可以调用说明的是在本地的jar包里面了
import com.atguigu.springcloud.entities.Dept;

@RestController
public class DeptController_Consumer
{

	private static final String REST_URL_PREFIX = "http://localhost:8001";
	//private static final String REST_URL_PREFIX = "http://MICROSERVICECLOUD-DEPT";
	/**
	 * 使用 使用restTemplate访问restful接口非常的简单粗暴无脑。 (url, requestMap,
	 * ResponseBean.class)这三个参数分别代表 REST请求地址
	 * 请求参数
	 * HTTP响应转换被转换成的对象类型。
	 */
	@Autowired
	private RestTemplate restTemplate;

	@RequestMapping(value = "/consumer/dept/add")
	public boolean add(Dept dept)
	{
		return restTemplate.postForObject(REST_URL_PREFIX + "/dept/add", dept, Boolean.class);
	}

	@RequestMapping(value = "/consumer/dept/get/{id}")
	public Dept get(@PathVariable("id") Long id)
	{
		int a = 5;
		return restTemplate.getForObject(REST_URL_PREFIX + "/dept/get/" + id, Dept.class);
	}

	//这个注解就是消除泛型的警告,想处理就处理不处理就算了
	@SuppressWarnings("unchecked")
	@RequestMapping(value = "/consumer/dept/list")
	public List<Dept> list()
	{
		return restTemplate.getForObject(REST_URL_PREFIX + "/dept/list", List.class);
	}

}
主启动类
package com.atguigu.springcloud;

import org.springframework.boot.SpringApplication;
import org.springframework.boot.autoconfigure.SpringBootApplication;


@SpringBootApplication
public class DeptConsumer80_App
{
	public static void main(String[] args)
	{
		SpringApplication.run(DeptConsumer80_App.class, args);
	}
}
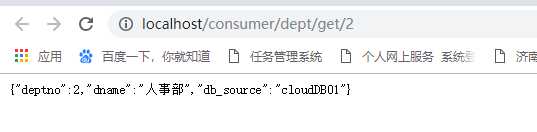
启动,查询
localhost/consumer/dept/get/2
localhost/consumer/dept/list

localhost/consumer/dept/add?dname=AI


--------------------上eureka--------------目前搭建了基础的框架,在这个框架的基础上实现微服务--------------19-------=========开始微服务的内容
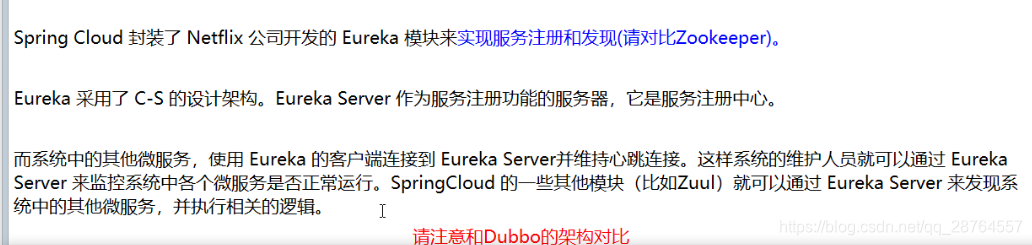
核心是服务的注册与发现

Eureka原理:https://blog.csdn.net/qwe86314/article/details/94552801


注意这两个组件是十分重要的,一定要注意是客户端和服务端。

客户端默认是轮询的负载均衡算法,应用启动会向服务端发心跳包,多次未收到就会删除(服务的实例)

---------------------------------------------------------20-------------------------------------------------
eureka分为服务端和客户端
构建Eureka的服务中心,服务端的构建十分简单,主要是在yml文件中配置好参数。
pom文件
引入新的组件都是先在pom加上坐标+然后EnableXXX

第一步:
<project xmlns="http://maven.apache.org/POM/4.0.0" xmlns:xsi="http://www.w3.org/2001/XMLSchema-instance"
         xsi:schemaLocation="http://maven.apache.org/POM/4.0.0 http://maven.apache.org/xsd/maven-4.0.0.xsd">
    <modelVersion>4.0.0</modelVersion>

    <parent>
        <groupId>com.atguigu.springcloud</groupId>
        <artifactId>microservicecloud</artifactId>
        <version>0.0.1-SNAPSHOT</version>
    </parent>

    <artifactId>microservicecloud-eureka-7001</artifactId>

    <dependencies>
        <!--告诉springboot它是eureka-server服务端 -->
        <dependency>
            <groupId>org.springframework.cloud</groupId>
            <artifactId>spring-cloud-starter-eureka-server</artifactId>
        </dependency>
        <!-- 修改后立即生效,热部署 -->
        <dependency>
            <groupId>org.springframework</groupId>
            <artifactId>springloaded</artifactId>
        </dependency>
        <dependency>
            <groupId>org.springframework.boot</groupId>
            <artifactId>spring-boot-devtools</artifactId>
        </dependency>
    </dependencies>

</project>
第二步:
yml文件

hostname就是IP地址。
server:
  port: 7001

eureka:
  instance:
   # hostname: localhost            #eureka服务端的实例名称
     hostname: eureka7001.com       #ip地址 注意这个是ip地址
  client:
    register-with-eureka: false     #false表示不向注册中心注册自己。否则启动自动注册的。
    fetch-registry: false           #false表示自己端就是注册中心,我的职责就是维护服务实例,并不需要去检索服务,并没有把自己写在入驻花名册里面,我自己就是甲方。
    service-url:
    # defaultZone: http://${eureka.instance.hostname}:${server.port}/eureka/
    #设置与Eureka Server交互的地址查询服务和注册服务都需要依赖这个地址(单机),就是物业的银行卡号让你去转账。
     defaultZone: http://eureka7002.com:7002/eureka/,http://eureka7003.com:7003/eureka/
微服务之间是互相交互的现成一个集群。
第三步:
开始要这么做。
package com.atguigu.springcloud;

import org.springframework.boot.SpringApplication;
import org.springframework.boot.autoconfigure.SpringBootApplication;
import org.springframework.cloud.netflix.eureka.server.EnableEurekaServer;

@SpringBootApplication
@EnableEurekaServer // EurekaServer服务器端启动类,接受其它微服务注册进来
public class EurekaServer7001_App
{
	public static void main(String[] args)
	{
		SpringApplication.run(EurekaServer7001_App.class, args);
	}
}
三步 pom yml @
启动测试:http://eureka7001.com:7001/
----------------------------------------引入Eureka的服务端---------------21----------------------------------
第一步:配置文件
服务的提供者,8001要入驻进7001的注册中心
首先是pom文件的修改,在7001中可知:
<!--告诉springboot它是eureka-server服务端 -->
        <dependency>
            <groupId>org.springframework.cloud</groupId>
            <artifactId>spring-cloud-starter-eureka-server</artifactId>
        </dependency>
说明是eureka的服务端。则在8001中则在pom中表明是eureka的client端,新增
  <!-- 将微服务provider侧注册进eureka -->
        <dependency>
            <groupId>org.springframework.cloud</groupId>
            <artifactId>spring-cloud-starter-eureka</artifactId>
        </dependency>
        <dependency>
            <groupId>org.springframework.cloud</groupId>
            <artifactId>spring-cloud-starter-config</artifactId>
        </dependency>
8001的yml
第二步:注解
先这么配置。
8001的著启动类要配置@EnableEurekaClient
package com.atguigu.springcloud;

import org.springframework.boot.SpringApplication;
import org.springframework.boot.autoconfigure.SpringBootApplication;
import org.springframework.cloud.client.discovery.EnableDiscoveryClient;
import org.springframework.cloud.netflix.eureka.EnableEurekaClient;

@SpringBootApplication
@EnableEurekaClient //本服务启动后会自动注册进eureka服务中
public class DeptProvider8001_App
{
	public static void main(String[] args)
	{
		SpringApplication.run(DeptProvider8001_App.class, args);
	}
}
服务端和客户端的对比

测试。。。。。。
客户端注册到eureka经过以下几个步骤
1.pom
2.yml
3.@注解 保证启动注册进去
--------------------------------------------------------------------------------------------------------------------------------------22

红色的字体是因为erueka的自我保护。


eureka的小细节的修改问题。
修改8001的yml文件
新加

改动的地方:
---服务的提供者作为Eureka的客户端入住到Eureak--------------23------------访问信息的ip提示-----------24-------------------
为服务info的详细信息添加,监控信息的完善,豪猪的熔断监控也是这样的。
8001的pom添加
1.8001添加,服务的提供者
<!-- actuator监控信息完善 -->
        <dependency>
            <groupId>org.springframework.boot</groupId>
            <artifactId>spring-boot-starter-actuator</artifactId>
        </dependency>
2.父工程添加build的构建信息
  <build>
        #父工程的名字
        <finalName>microservicecloud</finalName>
        #可以访问所有的父工程下面的resources文件下的信息
        <resources>
            <resource>
                <directory>src/main/resources</directory>
                <filtering>true</filtering>
            </resource>
        </resources>
        <plugins>
            <plugin>
                //负责解析和解读的
                <groupId>org.apache.maven.plugins</groupId>
                <artifactId>maven-resources-plugin</artifactId>
                <configuration>
                    <delimiters>
                        //以$开头和结尾的都可以读取在reources路径下的
                        <delimit>$</delimit>
                    </delimiters>
                </configuration>
            </plugin>
        </plugins>
    </build>
3.回到8001的yml
info:
  app.name: atguigu-microservicecloud
  company.name: www.atguigu.com
  build.artifactId: $project.artifactId$
  build.version: $project.version$
----------------------------------------监控信息的完善---------------------------------------------------------25----------
第二步:
8001中的DeptController中加入:
@Autowired
private DiscoveryClient client;
@RequestMapping(value = "/dept/discovery", method = RequestMethod.GET)
public Object discovery()
{
//盘点eureka有多少个微服务
List<String> list = client.getServices();//盘点eurka有哪些微服务
System.out.println("**********" + list);
List<ServiceInstance> srvList = client.getInstances("MICROSERVICECLOUD-DEPT");
for (ServiceInstance element : srvList) {
System.out.println(element.getServiceId() + "\t" + element.getHost() + "\t" + element.getPort() + "\t"
+ element.getUri());
}
return this.client;
}第一步:主启动类
@EnableDiscoveryClient //服务发现访问:localhost:8001/dept/discovery
消费者就是80工程的DeptController_consumer:
@RequestMapping(value = "/consumer/dept/discovery")
public Object discovery()
{
		return restTemplate.getForObject(REST_URL_PREFIX + "/dept/discovery",Object.class);
}访问:![]()
服务发现,不重要。
服发现:就是服务的消费端可以取到Eureka的所有服务,找到额定的服务。

-----------------------------------------------------------------------------------------------------------------27-------------
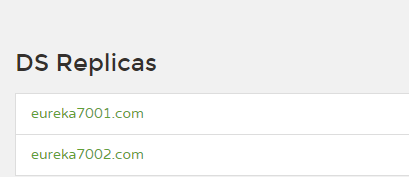
集群配置,联调
集群是eureka集群,eureka的三个服务端。
步骤:
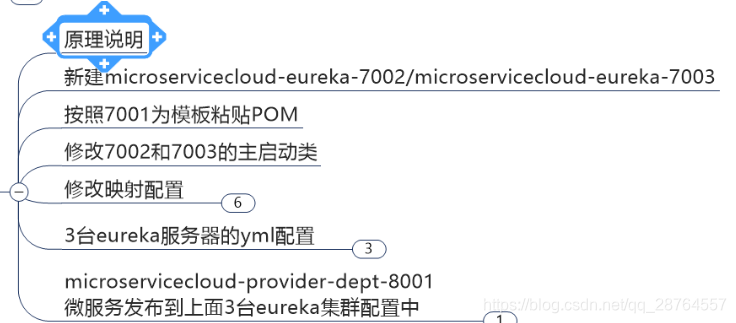
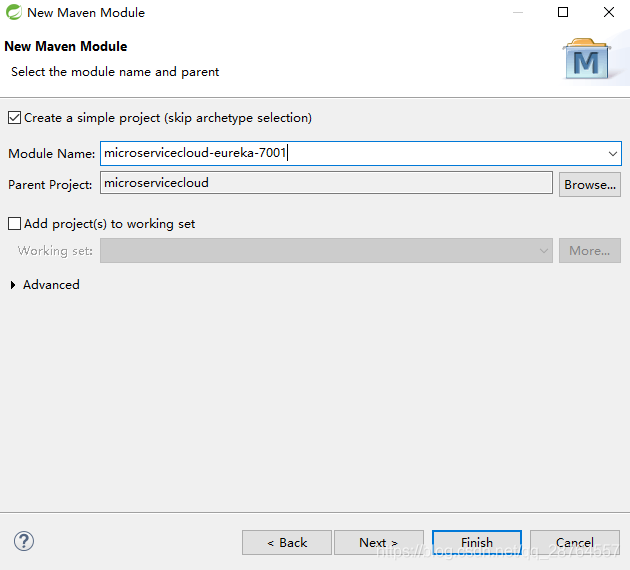
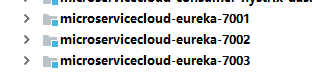
新建工程:
1.新建7002 7003
2.pom拷贝
3.需改主启动类 加@EnableEurekaServer // EurekaServer服务器端启动类,接受其它微服务注册进来
4.修改yml文件

127.0.0.1 eureka7001.com
127.0.0.1 eureka7002.com
127.0.0.1 eureka7003.com
yml原则就是7001上有7002和7003 7002上有7001和7003 7003上有7001和7002 服务是互相注册的
7001
server:
  port: 7001

eureka:
  instance:
   # hostname: localhost     #eureka服务端的实例名称
     hostname: eureka7001.com
  client:
    register-with-eureka: false     #false表示不向注册中心注册自己。
    fetch-registry: false           #false表示自己端就是注册中心,我的职责就是维护服务实例,并不需要去检索服务,并没有把自己写在入驻花名册里面
    service-url:
    # defaultZone: http://${eureka.instance.hostname}:${server.port}/eureka/
    #设置与Eureka Server交互的地址查询服务和注册服务都需要依赖这个地址(单机),就是物业的银行卡号让你去转账
     defaultZone: http://eureka7002.com:7002/eureka/,http://eureka7003.com:7003/eureka/
7002
server:
  port: 7002

eureka:
  instance:
   # hostname: localhost     #eureka服务端的实例名称
     hostname: eureka7002.com
  client:
    register-with-eureka: false     #false表示不向注册中心注册自己。
    fetch-registry: false           #false表示自己端就是注册中心,我的职责就是维护服务实例,并不需要去检索服务,并没有把自己写在入驻花名册里面
    service-url:
    # defaultZone: http://${eureka.instance.hostname}:${server.port}/eureka/
    #设置与Eureka Server交互的地址查询服务和注册服务都需要依赖这个地址(单机),就是物业的银行卡号让你去转账
     defaultZone: http://eureka7001.com:7001/eureka/,http://eureka7003.com:7003/eureka/
7003
server:
  port: 7003

eureka:
  instance:
   # hostname: localhost     #eureka服务端的实例名称
     hostname: eureka7003.com
  client:
    register-with-eureka: false     #false表示不向注册中心注册自己。
    fetch-registry: false           #false表示自己端就是注册中心,我的职责就是维护服务实例,并不需要去检索服务,并没有把自己写在入驻花名册里面
    service-url:
    # defaultZone: http://${eureka.instance.hostname}:${server.port}/eureka/
    #设置与Eureka Server交互的地址查询服务和注册服务都需要依赖这个地址(单机),就是物业的银行卡号让你去转账
     defaultZone: http://eureka7002.com:7002/eureka/,http://eureka7001.com:7001/eureka/
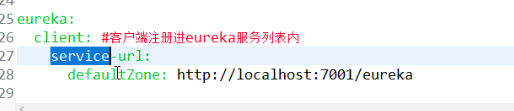
3.8001的修改就是服务的提供者,注册到三个服务端。
eureka:
client: #客户端注册进eureka服务列表内
service-url:
# defaultZone: http://localhost:7001/eureka //这个是8001要入驻的地址就是入驻到eureka的服务器
defaultZone: http://eureka7001.com:7001/eureka/,http://eureka7002.com:7002/eureka/,http://eureka7003.com:7003/eureka/
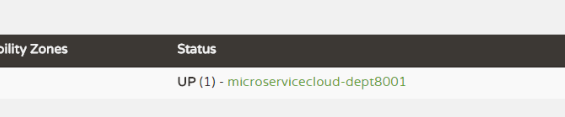
instance:
instance-id: microservicecloud-dept8001
prefer-ip-address: true #访问路径可以显示IP地址完整的8001的yml
server:
  port: 8001

mybatis:
  config-location: classpath:mybatis/mybatis.cfg.xml        # mybatis配置文件所在路径
  type-aliases-package: com.atguigu.springcloud.entities    # 所有Entity别名类所在包,告诉mybatis,扫描这个包的实体类
  mapper-locations:
  - classpath:mybatis/mapper/**/*.xml                       # mapper映射文件,写sql的

spring:
   application:
    name: microservicecloud-dept                            #微服务的名字 很重要  这个是服务名 以后消费者就是按照这个服务名找到服务
   datasource:
    type: com.alibaba.druid.pool.DruidDataSource            # 当前数据源操作类型
    driver-class-name: org.gjt.mm.mysql.Driver              # mysql驱动包
    url: jdbc:mysql://192.168.244.130:3306/cloudDB01              # 数据库名称
    username: root
    password: 123456
    dbcp2:
      min-idle: 5                                           # 数据库连接池的最小维持连接数
      initial-size: 5                                       # 初始化连接数
      max-total: 5                                          # 最大连接数
      max-wait-millis: 200                                  # 等待连接获取的最大超时时间

eureka:
  client: #客户端注册进eureka服务列表内
    service-url:
      # defaultZone: http://localhost:7001/eureka   //这个是8001要入驻的地址就是入驻到eureka的服务器
      defaultZone: http://eureka7001.com:7001/eureka/,http://eureka7002.com:7002/eureka/,http://eureka7003.com:7003/eureka/
  instance:
    instance-id: microservicecloud-dept8001
    prefer-ip-address: true     #访问路径可以显示IP地址

info:
  app.name: atguigu-microservicecloud
  company.name: www.atguigu.com
  build.artifactId: $project.artifactId$
  build.version: $project.version$
测试:
访问:

注册的微服务

-------------28------------------------------起三个集群---服务的提供者就是Eureka的客户端入驻到Eureka---------
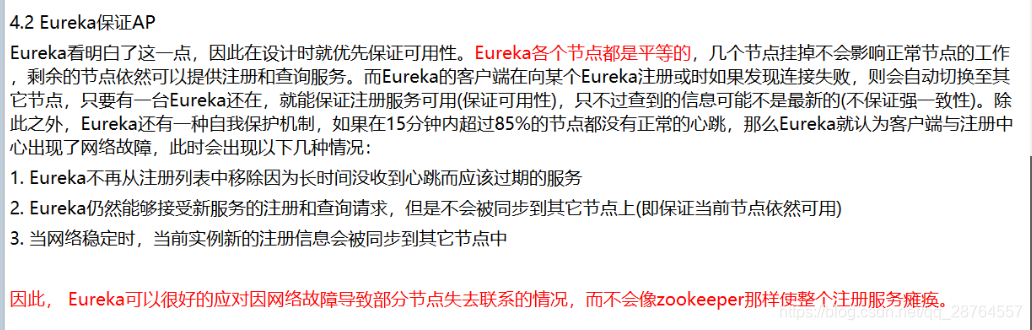
eureka与zookeeper的区别
CAP

eureak是AP zookeeper是CP


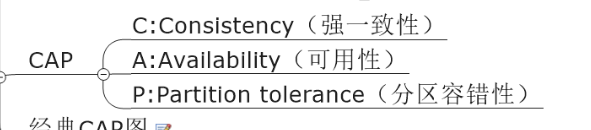
任何一个分布式系统无法全部满足

淘宝 京东只能是ap 不能是cp
双十一当天是ap保证网站可用

---------------------------------------------------------------29----------------------------------------------------------------
转开课吧。
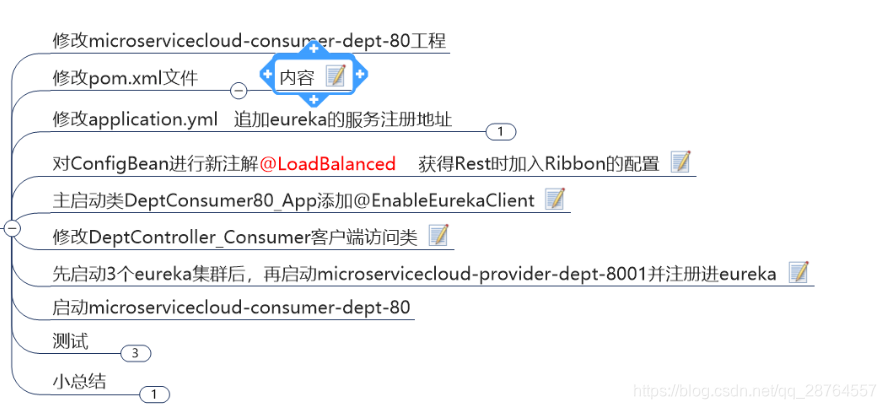
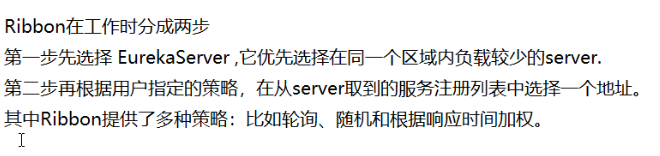
上Ribbon
Ribbon负载均衡很重要
面试题 负载均衡ngins ribbon 和 fegin区别
Ribbon就是客户端的负载均衡

配置文件中列出LoadBalance的所有的机器。


如何在github上找源码
https://github.com/Netflix/ribbon/wiki/Getting-Started
 这个很重要的。
----------------------------------30------------------------------------
上ribbon----客户端就是服务的消费者。
三步:
1.gav
2.@EnableXXXXX 在ConfigBean上添加的 在主启动类添加@EnableEurekaClient
3.写业务
明确是在客户端就是在服务的消费者上。
在80的consumer上:
1.pom新增:
<!-- Ribbon相关 -->
        <dependency>
            <!-- 为什么加eureka是因为去注册中心访问服务的实例,上ribbon必须上eureka -->
            <groupId>org.springframework.cloud</groupId>
            <artifactId>spring-cloud-starter-eureka</artifactId>
        </dependency>
        <dependency>
            <groupId>org.springframework.cloud</groupId>
            <artifactId>spring-cloud-starter-ribbon</artifactId>
        </dependency>
        <dependency>
            <groupId>org.springframework.cloud</groupId>
            <artifactId>spring-cloud-starter-config</artifactId>
        </dependency>
2.修改yml追加eureka的注册地址
这句话的意思是告诉80不要直接去找8001,去通过eureka去找,有了这句话80就可以听过服务名字去访问了。
eureka:
  client:
    register-with-eureka: false  //不注册自己只是服务的消费者
    service-url:
      defaultZone: http://eureka7001.com:7001/eureka/,http://eureka7002.com:7002/eureka/,http://eureka7003.com:7003/eureka/
3.开启负载均衡

package com.atguigu.springcloud.cfgbeans;


import org.springframework.cloud.client.loadbalancer.LoadBalanced;
import org.springframework.context.annotation.Bean;
import org.springframework.context.annotation.Configuration;
import org.springframework.web.client.RestTemplate;


@Configuration
public class ConfigBean //boot -->spring   applicationContext.xml --- @Configuration配置   ConfigBean = applicationContext.xml
{
	@Bean
	@LoadBalanced//Spring Cloud Ribbon是基于Netflix Ribbon实现的一套客户端       负载均衡的工具。
	public RestTemplate getRestTemplate()
	{
		return new RestTemplate();
	}

	/*@Bean
	public IRule myRule()
	{
		return new RoundRobinRule();
		//return new RandomRule();//达到的目的,用我们重新选择的随机算法替代默认的轮询。
		//return new RetryRule();
	}*/
}

//@Bean
//public UserServcie getUserServcie()
//{
//	return new UserServcieImpl();
//}
//applicationContext.xml == ConfigBean(@Configuration)
//<bean id="userServcie" class="com.atguigu.tmall.UserServiceImpl">
完成真正的通过微服务的名字通过eureka找到并访问。
4.主启动类添加@EnableEurekaClient
package com.atguigu.springcloud;

import org.springframework.boot.SpringApplication;
import org.springframework.boot.autoconfigure.SpringBootApplication;
import org.springframework.cloud.netflix.eureka.EnableEurekaClient;


@SpringBootApplication
@EnableEurekaClient
public class DeptConsumer80_App
{
	public static void main(String[] args)
	{
		SpringApplication.run(DeptConsumer80_App.class, args);
	}
}
5.修改客户端的访问类

修改controller:
用来是这样的:

package com.atguigu.springcloud.controller;

import java.util.List;

import org.springframework.beans.factory.annotation.Autowired;
import org.springframework.web.bind.annotation.PathVariable;
import org.springframework.web.bind.annotation.RequestMapping;
import org.springframework.web.bind.annotation.RestController;
import org.springframework.web.client.RestTemplate;
//这个过程并没有但是可以调用说明的是在本地的jar包里面了
import com.atguigu.springcloud.entities.Dept;

@RestController
public class DeptController_Consumer
{

	//private static final String REST_URL_PREFIX = "http://localhost:8001";
	private static final String REST_URL_PREFIX = "http://MICROSERVICECLOUD-DEPT";
	/**
	 * 使用 使用restTemplate访问restful接口非常的简单粗暴无脑。 (url, requestMap,
	 * ResponseBean.class)这三个参数分别代表 REST请求地址
	 * 请求参数
	 * HTTP响应转换被转换成的对象类型。
	 */
	@Autowired
	private RestTemplate restTemplate;

	@RequestMapping(value = "/consumer/dept/add")
	public boolean add(Dept dept)
	{
	  return restTemplate.postForObject(REST_URL_PREFIX + "/dept/add", dept, Boolean.class);
	}

	@RequestMapping(value = "/consumer/dept/get/{id}")
	public Dept get(@PathVariable("id") Long id)
	{
	 int a = 5;
	 return restTemplate.getForObject(REST_URL_PREFIX + "/dept/get/" + id, Dept.class);
	}

	//这个注解就是消除泛型的警告,想处理就处理不处理就算了
	@SuppressWarnings("unchecked")
	@RequestMapping(value = "/consumer/dept/list")
	public List<Dept> list()
	{
		return restTemplate.getForObject(REST_URL_PREFIX + "/dept/list", List.class);
	}

}
访问:
http://localhost/consumer/dept/list

理解:
private static final String REST_URL_PREFIX = "http://MICROSERVICECLOUD-DEPT";这句话的意思就是80去eureka找这个名字的微服务去访问,这个名字的微服务在7001 7002 7003都注册了

注意只用在Ribbon和Eureka整合后才可以。
//private static final String REST_URL_PREFIX = "http://localhost:8001";
private static final String REST_URL_PREFIX = "http://MICROSERVICECLOUD-DEPT";
目前为止只是换了访问的方式。

不整合是不好使的,即使是feign也是整合的Ribbon。
-------------------31----------

进入负载均衡编程,负载均衡就是客户端按照某种规则访问服务端8001 8002 8003:
理解一个知识点多个eureka只是为了down机器的,服务端才是集群。目前我们有一个eurekaServer的集群,但是不要当集群去理解,理解服务的提供者为集群本身。

新建8002 8003微服务的提供者

新建数据库:
jdbc:mysql://192.168.244.130:3306/cloudDB02
jdbc:mysql://192.168.244.130:3306/cloudDB03
修改yml的数据库地址 端口 还有这个
eureka:
  client: #客户端注册进eureka服务列表内
    service-url:
      # defaultZone: http://localhost:7001/eureka   //这个是8001要入驻的地址就是入驻到eureka的服务器
      defaultZone: http://eureka7001.com:7001/eureka/,http://eureka7002.com:7002/eureka/,http://eureka7003.com:7003/eureka/
  instance:
    instance-id: microservicecloud-dept8003
注意新建两个服务的提供者服务之后有一个名字是绝对不能动的:
spring:
   application:
    name: microservicecloud-dept  //这个是微服务的名字 8001 8002 8003是微服务的三个实例
启动测试:
先测试下三个服务的提供者是否能访问
http://localhost:8001/dept/list
http://localhost:8002/dept/list
http://localhost:8003/dept/list
测试:
consumer访问的负载均衡:
localhost/consumer/dept/list


------------------------------------------32--------------------------------------------

---------------------------------------------------------------------------------------------------------------------------32


https://github.com/Netflix/ribbon/wiki/Getting-Started
看ribbon的源码IRule类
/*
*
* Copyright 2013 Netflix, Inc.
*
* Licensed under the Apache License, Version 2.0 (the "License");
* you may not use this file except in compliance with the License.
* You may obtain a copy of the License at
*
* http://www.apache.org/licenses/LICENSE-2.0
*
* Unless required by applicable law or agreed to in writing, software
* distributed under the License is distributed on an "AS IS" BASIS,
* WITHOUT WARRANTIES OR CONDITIONS OF ANY KIND, either express or implied.
* See the License for the specific language governing permissions and
* limitations under the License.
*
*/
package com.netflix.loadbalancer;

/**
 * Interface that defines a "Rule" for a LoadBalancer. A Rule can be thought of
 * as a Strategy for loadbalacing. Well known loadbalancing strategies include
 * Round Robin, Response Time based etc.
 *
 * @author stonse
 *
 */
public interface IRule{
    /*
     * choose one alive server from lb.allServers or
     * lb.upServers according to key
     *
     * @return choosen Server object. NULL is returned if none
     *  server is available
     */

    public Server choose(Object key);

    public void setLoadBalancer(ILoadBalancer lb);

    public ILoadBalancer getLoadBalancer();
}
只要实现接口就能实现。
例如:ILoadBalancer
/*
*
* Copyright 2013 Netflix, Inc.
*
* Licensed under the Apache License, Version 2.0 (the "License");
* you may not use this file except in compliance with the License.
* You may obtain a copy of the License at
*
* http://www.apache.org/licenses/LICENSE-2.0
*
* Unless required by applicable law or agreed to in writing, software
* distributed under the License is distributed on an "AS IS" BASIS,
* WITHOUT WARRANTIES OR CONDITIONS OF ANY KIND, either express or implied.
* See the License for the specific language governing permissions and
* limitations under the License.
*
*/
package com.netflix.loadbalancer;

import java.util.List;

/**
 * Interface that defines the operations for a software loadbalancer. A typical
 * loadbalancer minimally need a set of servers to loadbalance for, a method to
 * mark a particular server to be out of rotation and a call that will choose a
 * server from the existing list of server.
 *
 * @author stonse
 *
 */
public interface ILoadBalancer {

	/**
	 * Initial list of servers.
	 * This API also serves to add additional ones at a later time
	 * The same logical server (host:port) could essentially be added multiple times
	 * (helpful in cases where you want to give more "weightage" perhaps ..)
	 *
	 * @param newServers new servers to add
	 */
	public void addServers(List<Server> newServers);

	/**
	 * Choose a server from load balancer.
	 *
	 * @param key An object that the load balancer may use to determine which server to return. null if
	 *         the load balancer does not use this parameter.
	 * @return server chosen
	 */
	public Server chooseServer(Object key);

	/**
	 * To be called by the clients of the load balancer to notify that a Server is down
	 * else, the LB will think its still Alive until the next Ping cycle - potentially
	 * (assuming that the LB Impl does a ping)
	 *
	 * @param server Server to mark as down
	 */
	public void markServerDown(Server server);

	/**
	 * @deprecated 2016-01-20 This method is deprecated in favor of the
	 * cleaner {@link #getReachableServers} (equivalent to availableOnly=true)
	 * and {@link #getAllServers} API (equivalent to availableOnly=false).
	 *
	 * Get the current list of servers.
	 *
	 * @param availableOnly if true, only live and available servers should be returned
	 */
	@Deprecated
	public List<Server> getServerList(boolean availableOnly);

	/**
	 * @return Only the servers that are up and reachable.
     */
    public List<Server> getReachableServers();

    /**
     * @return All known servers, both reachable and unreachable.
     */
	public List<Server> getAllServers();
}
抽象的AbstractLoadBalancer
/*
*
* Copyright 2013 Netflix, Inc.
*
* Licensed under the Apache License, Version 2.0 (the "License");
* you may not use this file except in compliance with the License.
* You may obtain a copy of the License at
*
* http://www.apache.org/licenses/LICENSE-2.0
*
* Unless required by applicable law or agreed to in writing, software
* distributed under the License is distributed on an "AS IS" BASIS,
* WITHOUT WARRANTIES OR CONDITIONS OF ANY KIND, either express or implied.
* See the License for the specific language governing permissions and
* limitations under the License.
*
*/
package com.netflix.loadbalancer;

import java.util.List;

/**
 * AbstractLoadBalancer contains features required for most loadbalancing
 * implementations.
 *
 * An anatomy of a typical LoadBalancer consists of 1. A List of Servers (nodes)
 * that are potentially bucketed based on a specific criteria. 2. A Class that
 * defines and implements a LoadBalacing Strategy via <code>IRule</code> 3. A
 * Class that defines and implements a mechanism to determine the
 * suitability/availability of the nodes/servers in the List.
 *
 *
 * @author stonse
 *
 */
public abstract class AbstractLoadBalancer implements ILoadBalancer {

    public enum ServerGroup{
        ALL,
        STATUS_UP,
        STATUS_NOT_UP
    }

    /**
     * delegate to {@link #chooseServer(Object)} with parameter null.
     */
    public Server chooseServer() {
    	return chooseServer(null);
    }


    /**
     * List of servers that this Loadbalancer knows about
     *
     * @param serverGroup Servers grouped by status, e.g., {@link ServerGroup#STATUS_UP}
     */
    public abstract List<Server> getServerList(ServerGroup serverGroup);

    /**
     * Obtain LoadBalancer related Statistics
     */
    public abstract LoadBalancerStats getLoadBalancerStats();
}
找到这个继承的类。
/*
 *
 * Copyright 2013 Netflix, Inc.
 *
 * Licensed under the Apache License, Version 2.0 (the "License");
 * you may not use this file except in compliance with the License.
 * You may obtain a copy of the License at
 *
 * http://www.apache.org/licenses/LICENSE-2.0
 *
 * Unless required by applicable law or agreed to in writing, software
 * distributed under the License is distributed on an "AS IS" BASIS,
 * WITHOUT WARRANTIES OR CONDITIONS OF ANY KIND, either express or implied.
 * See the License for the specific language governing permissions and
 * limitations under the License.
 *
 */
package com.netflix.loadbalancer;

import com.netflix.client.config.IClientConfig;
import org.slf4j.Logger;
import org.slf4j.LoggerFactory;

import java.util.List;
import java.util.concurrent.atomic.AtomicInteger;

/**
 * The most well known and basic load balancing strategy, i.e. Round Robin Rule.
 *
 * @author stonse
 * @author Nikos Michalakis <[email protected]>
 *
 */
public class RoundRobinRule extends AbstractLoadBalancerRule {

    private AtomicInteger nextServerCyclicCounter;
    private static final boolean AVAILABLE_ONLY_SERVERS = true;
    private static final boolean ALL_SERVERS = false;

    private static Logger log = LoggerFactory.getLogger(RoundRobinRule.class);

    public RoundRobinRule() {
        nextServerCyclicCounter = new AtomicInteger(0);
    }

    public RoundRobinRule(ILoadBalancer lb) {
        this();
        setLoadBalancer(lb);
    }

    public Server choose(ILoadBalancer lb, Object key) {
        if (lb == null) {
            log.warn("no load balancer");
            return null;
        }

        Server server = null;
        int count = 0;
        while (server == null && count++ < 10) {
            List<Server> reachableServers = lb.getReachableServers();
            List<Server> allServers = lb.getAllServers();
            int upCount = reachableServers.size();
            int serverCount = allServers.size();

            if ((upCount == 0) || (serverCount == 0)) {
                log.warn("No up servers available from load balancer: " + lb);
                return null;
            }

            int nextServerIndex = incrementAndGetModulo(serverCount);
            server = allServers.get(nextServerIndex);

            if (server == null) {
                /* Transient. */
                Thread.yield();
                continue;
            }

            if (server.isAlive() && (server.isReadyToServe())) {
                return (server);
            }

            // Next.
            server = null;
        }

        if (count >= 10) {
            log.warn("No available alive servers after 10 tries from load balancer: "
                    + lb);
        }
        return server;
    }

    /**
     * Inspired by the implementation of {@link AtomicInteger#incrementAndGet()}.
     *
     * @param modulo The modulo to bound the value of the counter.
     * @return The next value.
     */
    private int incrementAndGetModulo(int modulo) {
        for (;;) {
            int current = nextServerCyclicCounter.get();
            int next = (current + 1) % modulo;
            if (nextServerCyclicCounter.compareAndSet(current, next))
                return next;
        }
    }

    @Override
    public Server choose(Object key) {
        return choose(getLoadBalancer(), key);
    }
}
这个是轮询的我们用随机的算法更改下,轮询的修改只要向容器里面抛出一个bean就可以了,组件自动去调用:
在80的ConfigBean加
package com.atguigu.springcloud.cfgbeans;


import org.springframework.cloud.client.loadbalancer.LoadBalanced;
import org.springframework.context.annotation.Bean;
import org.springframework.context.annotation.Configuration;
import org.springframework.web.client.RestTemplate;

import com.netflix.loadbalancer.IRule;
import com.netflix.loadbalancer.RandomRule;
import com.netflix.loadbalancer.RetryRule;
import com.netflix.loadbalancer.RoundRobinRule;


@Configuration
public class ConfigBean //boot -->spring   applicationContext.xml --- @Configuration配置   ConfigBean = applicationContext.xml
{
	@Bean
	@LoadBalanced//Spring Cloud Ribbon是基于Netflix Ribbon实现的一套客户端       负载均衡的工具。
	public RestTemplate getRestTemplate()
	{
		return new RestTemplate();
	}

	@Bean
	public IRule myRule()
	{
		//return new RoundRobinRule();
		return new RandomRule();//达到的目的,用我们重新选择的随机算法替代默认的轮询。
		//return new RetryRule();
	}
}

//@Bean
//public UserServcie getUserServcie()
//{
//	return new UserServcieImpl();
//}
//applicationContext.xml == ConfigBean(@Configuration)
//<bean id="userServcie" class="com.atguigu.tmall.UserServiceImpl">
测试:localhost/consumer/dept/list
其他的规则RetryRuler
@Bean
	public IRule myRule()
	{
		//return new RoundRobinRule();
		//return new RandomRule();//达到的目的,用我们重新选择的随机算法替代默认的轮询。
		return new RetryRule();
	}
2按照轮询访问几次之后没法访问了就不去访问了。
------------------------------33-------------------------------------------
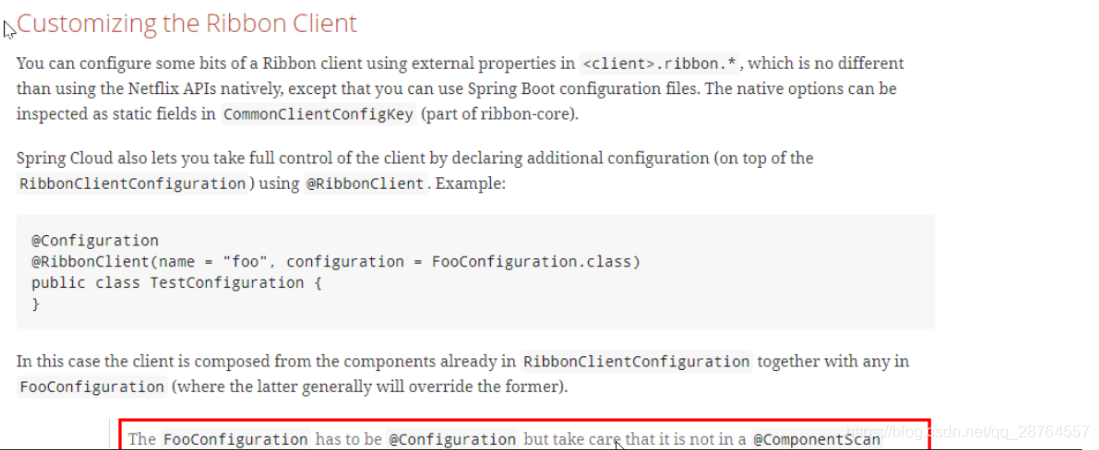
Ribbon的自定义
在git上拿源码:

加入这个注解,就是不再用Ribbon出厂默认的了:

修改步骤:1.在80的主启动类添加,就是自己定义IRule:
package com.atguigu.springcloud;

import com.atguigu.myrule.MySelfRule;
import org.springframework.boot.SpringApplication;
import org.springframework.boot.autoconfigure.SpringBootApplication;
import org.springframework.cloud.netflix.eureka.EnableEurekaClient;
import org.springframework.cloud.netflix.ribbon.RibbonClient;


@SpringBootApplication
@EnableEurekaClient
//在启动该微服务的时候就能去加载我们的自定义Ribbon配置类,从而使配置生效 指明是哪个服务的负载均衡
@RibbonClient(name="MICROSERVICECLOUD-DEPT",configuration=MySelfRule.class)
//@RibbonClient(name="MICROSERVICECLOUD-DEPT",configuration=MySelfRule.class)
public class DeptConsumer80_App
{
	public static void main(String[] args)
	{
		SpringApplication.run(DeptConsumer80_App.class, args);
	}
}
解释:只要能实现IRule接口的就符合负载均衡的规范的。
注意XXXRuler的配置细节,意思就是不能和主启动类在一起:


2.在80上新建包和类

package com.atguigu.myrule;

import com.netflix.loadbalancer.IRule;
import com.netflix.loadbalancer.RandomRule;
import com.netflix.loadbalancer.RoundRobinRule;

import org.springframework.context.annotation.Bean;
import org.springframework.context.annotation.Configuration;

@Configuration
public class MySelfRule
{
	@Bean
	public IRule myRule()
	{
		//return new RandomRule();// Ribbon默认是轮询,我自定义为随机
		//return new RoundRobinRule();// Ribbon默认是轮询,我自定义为随机
		return new RandomRule_ZY();// 我自定义为每台机器5次
	}
}
-------------------------------------------------------------------------------------------------------------------------------------34------------------------
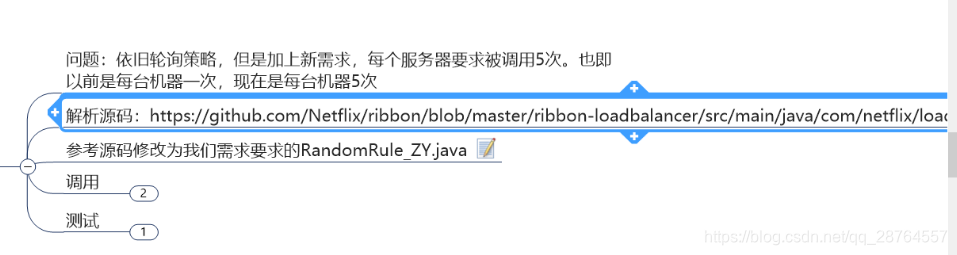
自定义负载均衡算法:
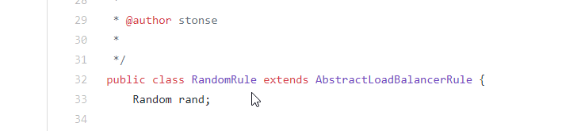
package com.atguigu.myrule;

import com.netflix.client.config.IClientConfig;
import com.netflix.loadbalancer.AbstractLoadBalancerRule;
import com.netflix.loadbalancer.ILoadBalancer;
import com.netflix.loadbalancer.Server;

import java.util.List;

public class RandomRule_ZY extends AbstractLoadBalancerRule
{

	// total = 0 // 当total==5以后,我们指针才能往下走,
	// index = 0 // 当前对外提供服务的服务器地址,
	// total需要重新置为零,但是已经达到过一个5次,我们的index = 1
	// 分析:我们5次,但是微服务只有8001 8002 8003 三台,OK?
	//


	private int total = 0; 			// 总共被调用的次数,目前要求每台被调用5次
	private int currentIndex = 0;	// 当前提供服务的机器号

	public Server choose(ILoadBalancer lb, Object key)
	{
		if (lb == null) {
			return null;
		}
		Server server = null;

		while (server == null) {
			if (Thread.interrupted()) {
				return null;
			}
			List<Server> upList = lb.getReachableServers();
			List<Server> allList = lb.getAllServers();

			int serverCount = allList.size();
			if (serverCount == 0) {
				/*
				 * No servers. End regardless of pass, because subsequent passes only get more
				 * restrictive.
				 */
				return null;
			}

//			int index = rand.nextInt(serverCount);// java.util.Random().nextInt(3);
//			server = upList.get(index);


//			private int total = 0; 			// 总共被调用的次数,目前要求每台被调用5次
//			private int currentIndex = 0;	// 当前提供服务的机器号
            if(total < 5)
            {
	            server = upList.get(currentIndex);
	            total++;
            }else {
	            total = 0;
	            currentIndex++;
	            if(currentIndex >= upList.size())
	            {
	              currentIndex = 0;
	            }
            }


			if (server == null) {
				/*
				 * The only time this should happen is if the server list were somehow trimmed.
				 * This is a transient condition. Retry after yielding.
				 */
				Thread.yield();
				continue;
			}

			if (server.isAlive()) {
				return (server);
			}

			// Shouldn't actually happen.. but must be transient or a bug.
			server = null;
			Thread.yield();
		}

		return server;

	}

	@Override
	public Server choose(Object key)
	{
		return choose(getLoadBalancer(), key);
	}

	@Override
	public void initWithNiwsConfig(IClientConfig clientConfig)
	{
		// TODO Auto-generated method stub

	}

}
新的需求
修改MySelfRule
package com.atguigu.myrule;

import com.netflix.loadbalancer.IRule;
import com.netflix.loadbalancer.RandomRule;
import com.netflix.loadbalancer.RoundRobinRule;

import org.springframework.context.annotation.Bean;
import org.springframework.context.annotation.Configuration;

@Configuration
public class MySelfRule
{
	@Bean
	public IRule myRule()
	{
		//return new RandomRule();// Ribbon默认是轮询,我自定义为随机
		//return new RoundRobinRule();// Ribbon默认是轮询,我自定义为随机

		return new RandomRule_ZY();// 我自定义为每台机器5次
	}
}
package com.atguigu.myrule;

import com.netflix.client.config.IClientConfig;
import com.netflix.loadbalancer.AbstractLoadBalancerRule;
import com.netflix.loadbalancer.ILoadBalancer;
import com.netflix.loadbalancer.Server;

import java.util.List;

public class RandomRule_ZY extends AbstractLoadBalancerRule
{

	// total = 0 // 当total==5以后,我们指针才能往下走,
	// index = 0 // 当前对外提供服务的服务器地址,
	// total需要重新置为零,但是已经达到过一个5次,我们的index = 1
	// 分析:我们5次,但是微服务只有8001 8002 8003 三台,OK?
	//


	private int total = 0; 			// 总共被调用的次数,目前要求每台被调用5次
	private int currentIndex = 0;	// 当前提供服务的机器号

	public Server choose(ILoadBalancer lb, Object key)
	{
		if (lb == null) {
			return null;
		}
		Server server = null;

		while (server == null) {
			if (Thread.interrupted()) {
				return null;
			}
			List<Server> upList = lb.getReachableServers();
			List<Server> allList = lb.getAllServers();

			int serverCount = allList.size();
			if (serverCount == 0) {
				/*
				 * No servers. End regardless of pass, because subsequent passes only get more
				 * restrictive.
				 */
				return null;
			}

//			int index = rand.nextInt(serverCount);// java.util.Random().nextInt(3);
//			server = upList.get(index);


//			private int total = 0; 			// 总共被调用的次数,目前要求每台被调用5次
//			private int currentIndex = 0;	// 当前提供服务的机器号
            if(total < 5)
            {
	            server = upList.get(currentIndex);
	            total++;
            }else {
	            total = 0;
	            currentIndex++;
	            if(currentIndex >= upList.size())
	            {
	              currentIndex = 0;
	            }
            }


			if (server == null) {
				/*
				 * The only time this should happen is if the server list were somehow trimmed.
				 * This is a transient condition. Retry after yielding.
				 */
				Thread.yield();
				continue;
			}

			if (server.isAlive()) {
				return (server);
			}

			// Shouldn't actually happen.. but must be transient or a bug.
			server = null;
			Thread.yield();
		}

		return server;

	}

	@Override
	public Server choose(Object key)
	{
		return choose(getLoadBalancer(), key);
	}

	@Override
	public void initWithNiwsConfig(IClientConfig clientConfig)
	{
		// TODO Auto-generated method stub

	}

}
注意看下主启动类
package com.atguigu.springcloud;

import org.springframework.boot.SpringApplication;
import org.springframework.boot.autoconfigure.SpringBootApplication;
import org.springframework.cloud.netflix.eureka.EnableEurekaClient;
import org.springframework.cloud.netflix.ribbon.RibbonClient;

import com.atguigu.myrule.MySelfRule;


@SpringBootApplication
@EnableEurekaClient
@RibbonClient(name="MICROSERVICECLOUD-DEPT",configuration=MySelfRule.class)//不加就是默认的
public class DeptConsumer80_App
{
	public static void main(String[] args)
	{
		SpringApplication.run(DeptConsumer80_App.class, args);
	}
}
小总结:ribbon要加eureka因为要去eureka上面指定是哪个微服务的负载均衡。
-----------------------35-------------------自定义负载均衡---------
Feign
官网:
也是负载均衡的。
用Feign只需要创建接口和注解即可。

还是组件的三大步 pom @ yml


接口api上有 接口的注解

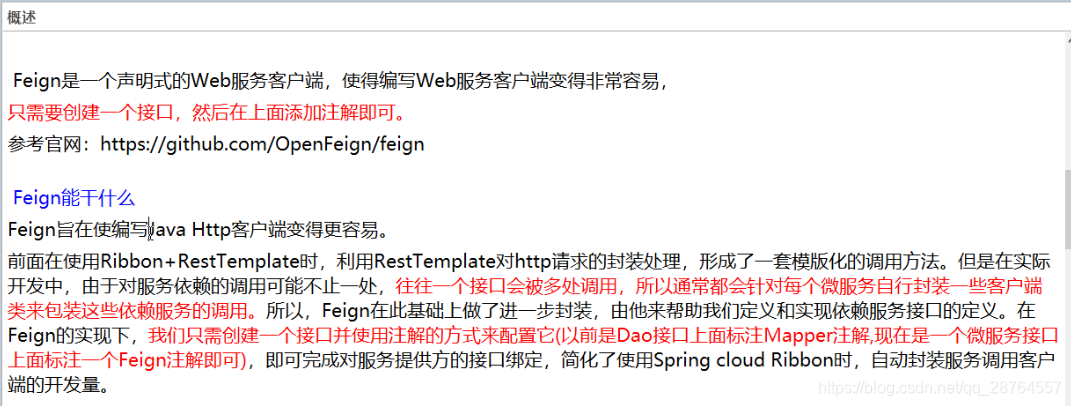
类似于Dao。
接口加注解其实是在xml对应的:
---------------------------------------------------------------------------36-------------
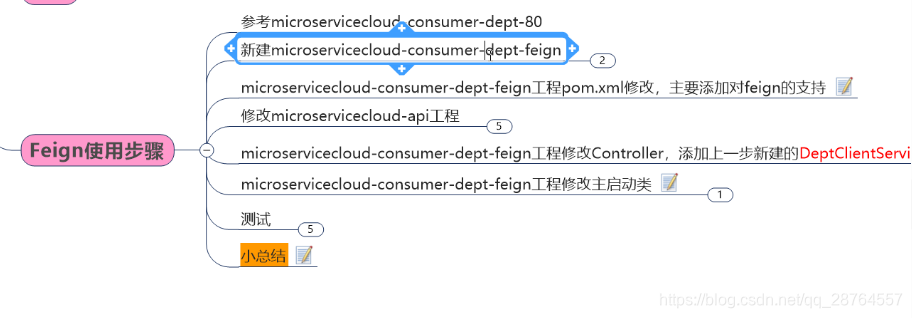
feign也是在客户端,创建一个带feign的客户端。

拷贝80的代码 pom和类
修改pom。
首先拷贝80的。
<project xmlns="http://maven.apache.org/POM/4.0.0" xmlns:xsi="http://www.w3.org/2001/XMLSchema-instance" xsi:schemaLocation="http://maven.apache.org/POM/4.0.0 http://maven.apache.org/xsd/maven-4.0.0.xsd">
  <modelVersion>4.0.0</modelVersion>
  <parent>
    <groupId>com.atguigu.springcloud</groupId>
    <artifactId>microservicecloud</artifactId>
    <version>0.0.1-SNAPSHOT</version>
  </parent>
  <artifactId>microservicecloud-consumer-dept-feign</artifactId>
<dependencies>
        <dependency><!-- 自己定义的api -->
            <groupId>com.atguigu.springcloud</groupId>
            <artifactId>microservicecloud-api</artifactId>
            <version>${project.version}</version>
        </dependency>
        <!-- Ribbon相关 -->
        <dependency>
            <groupId>org.springframework.cloud</groupId>
            <artifactId>spring-cloud-starter-eureka</artifactId>
        </dependency>
         <dependency>
            <groupId>org.springframework.cloud</groupId>
            <artifactId>spring-cloud-starter-ribbon</artifactId>
        </dependency>
        <dependency>
            <groupId>org.springframework.cloud</groupId>
            <artifactId>spring-cloud-starter-config</artifactId>
        </dependency>
        <dependency>
            <groupId>org.springframework.boot</groupId>
            <artifactId>spring-boot-starter-web</artifactId>
        </dependency>
         <dependency>
            <groupId>org.springframework.cloud</groupId>
            <artifactId>spring-cloud-starter-feign</artifactId>
        </dependency>
        <!-- 修改后立即生效,热部署 -->
        <dependency>
            <groupId>org.springframework</groupId>
            <artifactId>springloaded</artifactId>
        </dependency>
        <dependency>
            <groupId>org.springframework.boot</groupId>
            <artifactId>spring-boot-devtools</artifactId>
        </dependency>
    </dependencies>

</project>
已经加入feign的pom坐标
        <dependency>
            <groupId>org.springframework.cloud</groupId>
            <artifactId>spring-cloud-starter-feign</artifactId>
        </dependency>
修改主启动类改名字
package com.atguigu.springcloud;

import org.springframework.boot.SpringApplication;
import org.springframework.boot.autoconfigure.SpringBootApplication;
import org.springframework.cloud.netflix.eureka.EnableEurekaClient;


@SpringBootApplication
@EnableEurekaClient
public class DeptConsumer80_Feign_App
{
	public static void main(String[] args)
	{
		SpringApplication.run(DeptConsumer80_Feign_App.class, args);
	}
}
--------------------------修改api-------------
修改api工程,通用的公共的接口,放在api中。
1.修改api的pom文件,在api上加feign。
<project xmlns="http://maven.apache.org/POM/4.0.0" xmlns:xsi="http://www.w3.org/2001/XMLSchema-instance"
         xsi:schemaLocation="http://maven.apache.org/POM/4.0.0 http://maven.apache.org/xsd/maven-4.0.0.xsd">
    <modelVersion>4.0.0</modelVersion>

    <parent><!-- 子类里面显示声明才能有明确的继承表现,无意外就是父类的默认版本否则自己定义 -->
        <groupId>com.atguigu.springcloud</groupId>
        <artifactId>microservicecloud</artifactId>
        <version>0.0.1-SNAPSHOT</version>
    </parent>

    <artifactId>microservicecloud-api</artifactId><!-- 当前Module我自己叫什么名字 -->

    <dependencies><!-- 当前Module需要用到的jar包,按自己需求添加,如果父类已经包含了,可以不用写版本号 -->
        <dependency>
            <groupId>org.projectlombok</groupId>
            <artifactId>lombok</artifactId>
        </dependency>
          <dependency>
            <groupId>org.springframework.cloud</groupId>
            <artifactId>spring-cloud-starter-feign</artifactId>
        </dependency>
    </dependencies>
</project>
2.新建DeptClientService接口并新增注解@FeignClient
package com.atguigu.springcloud.service;

import com.atguigu.springcloud.entities.Dept;
import org.springframework.cloud.netflix.feign.FeignClient;
import org.springframework.web.bind.annotation.PathVariable;
import org.springframework.web.bind.annotation.RequestMapping;
import org.springframework.web.bind.annotation.RequestMethod;

import java.util.List;


/**
 *
 * @Description: 修改microservicecloud-api工程,根据已经有的DeptClientService接口

新建

一个实现了FallbackFactory接口的类DeptClientServiceFallbackFactory
 * @author zzyy
 * @date 2018年4月21日
 */
@FeignClient(value = "MICROSERVICECLOUD-DEPT")//指定去哪个微服务找并和里面的服务的方法匹配
public interface DeptClientService
{
	@RequestMapping(value = "/dept/get/{id}", method = RequestMethod.GET)
	public Dept get(@PathVariable("id") long id);

	@RequestMapping(value = "/dept/list", method = RequestMethod.GET)
	public List<Dept> list();

	@RequestMapping(value = "/dept/add", method = RequestMethod.POST)
	public boolean add(Dept dept);
}

这句话的意思是对MICROSERVICECLOUD-DEPT微服务进行feign编程
完成
---------------------------------------------------
接下来回到feign工程,添加service。
package com.atguigu.springcloud.controller;

import java.util.List;

import org.springframework.beans.factory.annotation.Autowired;
import org.springframework.web.bind.annotation.PathVariable;
import org.springframework.web.bind.annotation.RequestMapping;
import org.springframework.web.bind.annotation.RestController;

import com.atguigu.springcloud.entities.Dept;
import com.atguigu.springcloud.service.DeptClientService;

@RestController
public class DeptController_Consumer
{
        //调用api的service
	@Autowired
	private DeptClientService service;

	@RequestMapping(value = "/consumer/dept/get/{id}")
	public Dept get(@PathVariable("id") Long id)
	{
		return this.service.get(id);
	}

	@RequestMapping(value = "/consumer/dept/list")
	public List<Dept> list()
	{
		return this.service.list();
	}

	@RequestMapping(value = "/consumer/dept/add")
	public Object add(Dept dept)
	{
		return this.service.add(dept);
	}
}
feign修改主启动类
package com.atguigu.springcloud;

import org.springframework.boot.SpringApplication;
import org.springframework.boot.autoconfigure.SpringBootApplication;
import org.springframework.cloud.netflix.eureka.EnableEurekaClient;
import org.springframework.cloud.netflix.feign.EnableFeignClients;
import org.springframework.context.annotation.ComponentScan;


@SpringBootApplication
@EnableEurekaClient
@EnableFeignClients(basePackages= {"com.atguigu.springcloud"})
@ComponentScan("com.atguigu.springcloud")
public class DeptConsumer80_Feign_App
{
	public static void main(String[] args)
	{
		SpringApplication.run(DeptConsumer80_Feign_App.class, args);
	}
}

访问:
1.定义服务
2.绑定接口
3.写接口已经声明的方法
测试:
localhost/consumer/dept/list

--------------------------------------------Feign-----------------------------37--------------
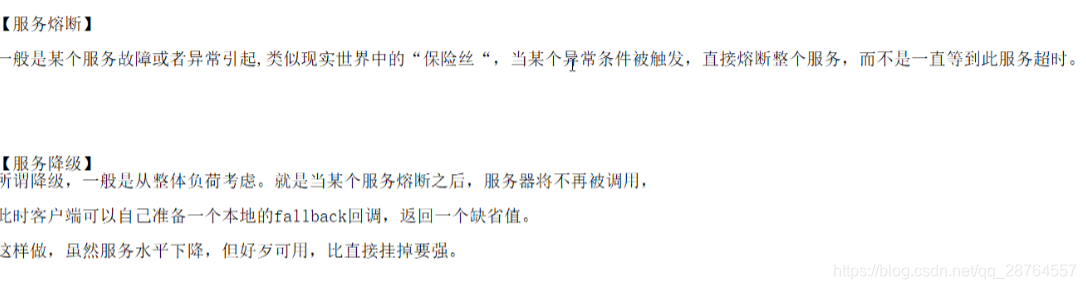
熔断机制


层层递推会产生雪崩。


---------------------38------------------------
上服务熔断器,熔断是在服务端的,因为是服务端的报错:
Hystris引入
1.maven坐标
2.@Enable

新建子工程:


1.pom
拷贝8001的。
<dependencies>
		<!-- hystrix -->
		<dependency>
			<groupId>org.springframework.cloud</groupId>
			<artifactId>spring-cloud-starter-hystrix</artifactId>
		</dependency>
		<!-- 将微服务provider侧注册进eureka -->
		<dependency>
			<groupId>org.springframework.cloud</groupId>
			<artifactId>spring-cloud-starter-eureka</artifactId>
		</dependency>
		<!-- 引入自己定义的api通用包,可以使用Dept部门Entity -->
		<dependency>
			<groupId>com.atguigu.springcloud</groupId>
			<artifactId>microservicecloud-api</artifactId>
			<version>${project.version}</version>
		</dependency>
		<dependency>
			<groupId>org.springframework.cloud</groupId>
			<artifactId>spring-cloud-starter-config</artifactId>
		</dependency>
		<!-- actuator监控信息完善 -->
		<dependency>
			<groupId>org.springframework.boot</groupId>
			<artifactId>spring-boot-starter-actuator</artifactId>
		</dependency>
		<dependency>
			<groupId>junit</groupId>
			<artifactId>junit</artifactId>
		</dependency>
		<dependency>
			<groupId>mysql</groupId>
			<artifactId>mysql-connector-java</artifactId>
		</dependency>
		<dependency>
			<groupId>com.alibaba</groupId>
			<artifactId>druid</artifactId>
		</dependency>
		<dependency>
			<groupId>ch.qos.logback</groupId>
			<artifactId>logback-core</artifactId>
		</dependency>
		<dependency>
			<groupId>org.mybatis.spring.boot</groupId>
			<artifactId>mybatis-spring-boot-starter</artifactId>
		</dependency>
		<dependency>
			<groupId>org.springframework.boot</groupId>
			<artifactId>spring-boot-starter-jetty</artifactId>
		</dependency>
		<dependency>
			<groupId>org.springframework.boot</groupId>
			<artifactId>spring-boot-starter-web</artifactId>
		</dependency>
		<dependency>
			<groupId>org.springframework.boot</groupId>
			<artifactId>spring-boot-starter-test</artifactId>
		</dependency>
		<!-- 修改后立即生效,热部署 -->
		<dependency>
			<groupId>org.springframework</groupId>
			<artifactId>springloaded</artifactId>
		</dependency>
		<dependency>
			<groupId>org.springframework.boot</groupId>
			<artifactId>spring-boot-devtools</artifactId>
		</dependency>
	</dependencies>

</project>
加入hystrix
<!-- hystrix -->
		<dependency>
			<groupId>org.springframework.cloud</groupId>
			<artifactId>spring-cloud-starter-hystrix</artifactId>
		</dependency>
2.yml修改:
和8001的区别:
eureka:
  client: #客户端注册进eureka服务列表内
    service-url:
      defaultZone: http://eureka7001.com:7001/eureka/,http://eureka7002.com:7002/eureka/,http://eureka7003.com:7003/eureka/
  instance:
    instance-id: microservicecloud-dept8001-hystrix   #自定义hystrix相关的服务名称信息
    prefer-ip-address: true     #访问路径可以显示IP地址
表明是带熔断器的服务。
3.主配置类
package com.atguigu.springcloud;

import org.springframework.boot.SpringApplication;
import org.springframework.boot.autoconfigure.SpringBootApplication;
import org.springframework.cloud.client.circuitbreaker.EnableCircuitBreaker;
import org.springframework.cloud.client.discovery.EnableDiscoveryClient;
import org.springframework.cloud.netflix.eureka.EnableEurekaClient;

@SpringBootApplication
@EnableEurekaClient //本服务启动后会自动注册进eureka服务中
@EnableDiscoveryClient //服务发现
@EnableCircuitBreaker//对hystrixR熔断机制的支持
public class DeptProvider8001_Hystrix_App
{
	public static void main(String[] args)
	{
		SpringApplication.run(DeptProvider8001_Hystrix_App.class, args);
	}
}
4.回到controller

package com.atguigu.springcloud.controller;

import org.springframework.beans.factory.annotation.Autowired;
import org.springframework.web.bind.annotation.PathVariable;
import org.springframework.web.bind.annotation.RequestMapping;
import org.springframework.web.bind.annotation.RequestMethod;
import org.springframework.web.bind.annotation.RestController;

import com.atguigu.springcloud.entities.Dept;
import com.atguigu.springcloud.service.DeptService;
import com.netflix.hystrix.contrib.javanica.annotation.HystrixCommand;

@RestController
public class DeptController
{
	@Autowired
	private DeptService service = null;

	@RequestMapping(value = "/dept/get/{id}", method = RequestMethod.GET)
	//一旦调用服务方法失败并抛出了错误信息后,会自动调用@HystrixCommand标注好的fallbackMethod调用类中的指定方法
	@HystrixCommand(fallbackMethod = "processHystrix_Get")
	public Dept get(@PathVariable("id") Long id)
	{

		Dept dept = this.service.get(id);

		if (null == dept) {
			throw new RuntimeException("该ID:" + id + "没有没有对应的信息");
		}

		return dept;
	}

	public Dept processHystrix_Get(@PathVariable("id") Long id)
	{
		return new Dept().setDeptno(id).setDname("该ID:" + id + "没有没有对应的信息,null--@HystrixCommand")
				.setDb_source("no this database in MySQL");
	}
}
解释:

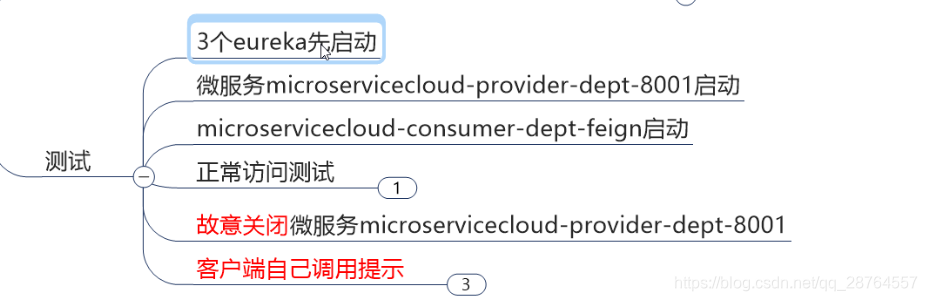
测试:
http://eureka7001.com:7001/ 查看带熔断的服务
起三个7001和熔断的8001
起消费者:

-------------39-------------------

开发流程

解释图谱:

服务降级的意思就是现在A的访问量急剧飙升,此时借调C的几个程序员去合力搞A,这就是服务的降级,但是要告诉找C的老客户我们服务是降级的,他们就去A或者B跑了。

我们的项目就是关掉一个微服务而不是服务熔断的只是RuntimeException。
服务的降级是在客户端完成的与服务端没有关系
1.上一讲讲的会有一个问题就是服务的膨胀,而且带熔断的8001整体服务挂了就没了。
2.aop编程,前置通知,后置通知,异常通知,不要耦合。
此时的方法是我们让其在接口绑定,就是在api这个过程上绑定的。
注意这个api是公共的接口,我们使用的时候不要弄混。
package com.atguigu.springcloud.service;

import com.atguigu.springcloud.entities.Dept;
import feign.hystrix.FallbackFactory;
import org.springframework.stereotype.Component;

import java.util.List;

@Component // 不要忘记添加,不要忘记添加
public class DeptClientServiceFallbackFactory implements FallbackFactory<DeptClientService>
{
	@Override
	public DeptClientService create(Throwable throwable)
	{
		return new DeptClientService() {
			@Override
			public Dept get(long id)
			{
				return new Dept().setDeptno(id).setDname("该ID:" + id + "没有没有对应的信息,Consumer客户端提供的降级信息,此刻服务Provider已经关闭")
						.setDb_source("no this database in MySQL");
			}

			@Override
			public List<Dept> list()
			{
				return null;
			}

			@Override
			public boolean add(Dept dept)
			{
				return false;
			}
		};
	}
}

模拟场景忍痛将某个微服务关掉,有其他的客户访问的时候会怎么样。
package com.atguigu.springcloud.service;

import com.atguigu.springcloud.entities.Dept;
import org.springframework.cloud.netflix.feign.FeignClient;
import org.springframework.web.bind.annotation.PathVariable;
import org.springframework.web.bind.annotation.RequestMapping;
import org.springframework.web.bind.annotation.RequestMethod;

import java.util.List;


/**
 *
 * @Description: 修改microservicecloud-api工程,根据已经有的DeptClientService接口
         新建一个实现了FallbackFactory接口的类DeptClientServiceFallbackFactory
 * @author zzyy
 * @date 2018年4月21日
 */
@FeignClient(value = "MICROSERVICECLOUD-DEPT",fallbackFactory=DeptClientServiceFallbackFactory.class)
public interface DeptClientService
{
    @RequestMapping(value = "/dept/get/{id}", method = RequestMethod.GET)
    public Dept get(@PathVariable("id") long id);

    @RequestMapping(value = "/dept/list", method = RequestMethod.GET)
    public List<Dept> list();

    @RequestMapping(value = "/dept/add", method = RequestMethod.POST)
    public boolean add(Dept dept);
}
这个意思是DeptClientService出了问题统一去DeptClientServiceFallbackFactory
回到feign工程
加入这么一句话
feign:
  hystrix:
    enabled: true
验证。
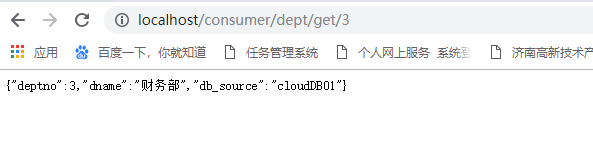
访问:localhost/consumer/dept/get/1
关闭8001


就不会反复调用了。
-------------------服务降级-----------------------------------------------40---------------------------------
假设10万个用户,超时。

 、
、
---
aop---切面 服务降级。
服务提供者业务逻辑不用带很多东西。
好处:主业务和熔断结构 避免方法膨胀。


-------熔断降级小总结------------------------------41--------------------------

脑图:


1.pom新增坐标
<!-- hystrix和 hystrix-dashboard相关 -->
		<dependency>
			<groupId>org.springframework.cloud</groupId>
			<artifactId>spring-cloud-starter-hystrix</artifactId>
		</dependency>
		<dependency>
			<groupId>org.springframework.cloud</groupId>
			<artifactId>spring-cloud-starter-hystrix-dashboard</artifactId>
		</dependency>
全的pom
<project xmlns="http://maven.apache.org/POM/4.0.0" xmlns:xsi="http://www.w3.org/2001/XMLSchema-instance" xsi:schemaLocation="http://maven.apache.org/POM/4.0.0 http://maven.apache.org/xsd/maven-4.0.0.xsd">
  <modelVersion>4.0.0</modelVersion>
  <parent>
    <groupId>com.atguigu.springcloud</groupId>
    <artifactId>microservicecloud</artifactId>
    <version>0.0.1-SNAPSHOT</version>
  </parent>
  <artifactId>microservicecloud-consumer-hystrix-dashboard</artifactId>

<dependencies>
		<!-- 自己定义的api -->
		<dependency>
			<groupId>com.atguigu.springcloud</groupId>
			<artifactId>microservicecloud-api</artifactId>
			<version>${project.version}</version>
		</dependency>
		<dependency>
			<groupId>org.springframework.boot</groupId>
			<artifactId>spring-boot-starter-web</artifactId>
		</dependency>
		<!-- 修改后立即生效,热部署 -->
		<dependency>
			<groupId>org.springframework</groupId>
			<artifactId>springloaded</artifactId>
		</dependency>
		<dependency>
			<groupId>org.springframework.boot</groupId>
			<artifactId>spring-boot-devtools</artifactId>
		</dependency>
		<!-- Ribbon相关 -->
		<dependency>
			<groupId>org.springframework.cloud</groupId>
			<artifactId>spring-cloud-starter-eureka</artifactId>
		</dependency>
		<dependency>
			<groupId>org.springframework.cloud</groupId>
			<artifactId>spring-cloud-starter-ribbon</artifactId>
		</dependency>
		<dependency>
			<groupId>org.springframework.cloud</groupId>
			<artifactId>spring-cloud-starter-config</artifactId>
		</dependency>
		<!-- feign相关 -->
		<dependency>
			<groupId>org.springframework.cloud</groupId>
			<artifactId>spring-cloud-starter-feign</artifactId>
		</dependency>
		<!-- hystrix和 hystrix-dashboard相关 -->
		<dependency>
			<groupId>org.springframework.cloud</groupId>
			<artifactId>spring-cloud-starter-hystrix</artifactId>
		</dependency>
		<dependency>
			<groupId>org.springframework.cloud</groupId>
			<artifactId>spring-cloud-starter-hystrix-dashboard</artifactId>
		</dependency>
	</dependencies>
</project>
2.yml
server:
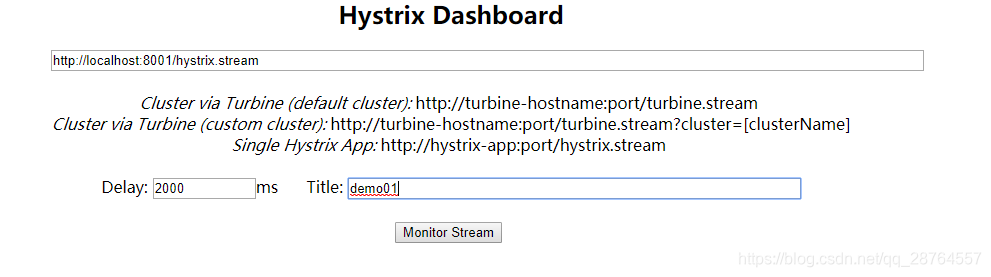
port: 90013.主启动类
package com.atguigu.springcloud;

import org.springframework.boot.SpringApplication;
import org.springframework.boot.autoconfigure.SpringBootApplication;
import org.springframework.cloud.netflix.hystrix.dashboard.EnableHystrixDashboard;

@SpringBootApplication
@EnableHystrixDashboard
public class DeptConsumer_DashBoard_App
{
	public static void main(String[] args)
	{
		SpringApplication.run(DeptConsumer_DashBoard_App.class, args);
	}
}
4.检查带熔断的8001的监控信息是否完善
     <!-- actuator监控信息完善 -->
        <dependency>
            <groupId>org.springframework.boot</groupId>
            <artifactId>spring-boot-starter-actuator</artifactId>
        </dependency>
5.启动

----------豪猪hystrixDashboard--------------42-------------------------
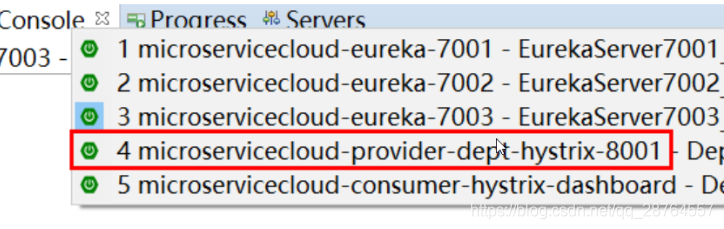
启动三个eureka集群。
启动这个
![]()
总的:
测试:
localhost:8001/dept/get/1
http://localhost:8001/hystrix.stream
一直在走说明在做测试。
图形化的展示:

目前是9001在监控带熔断的8001

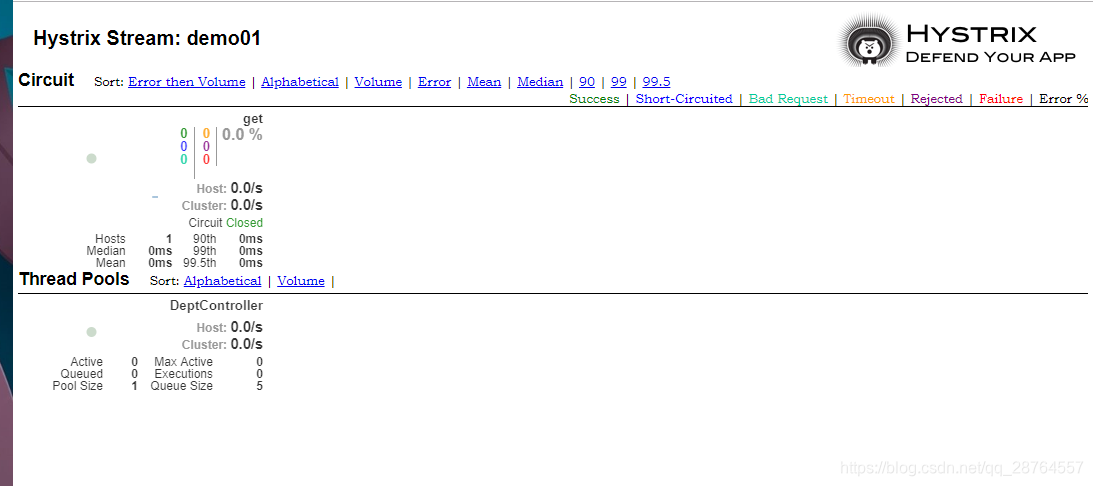

如何看参数:
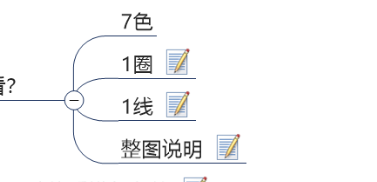


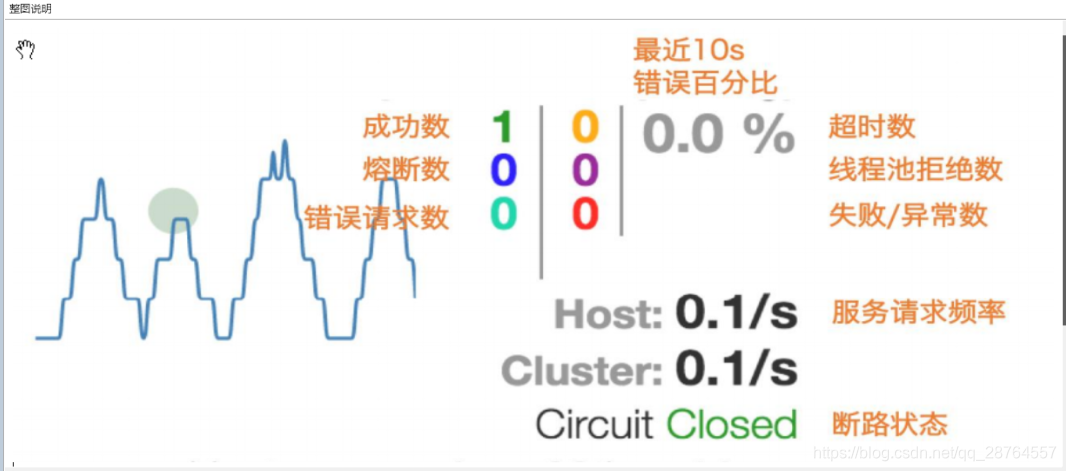

-----------查看和使用------------------------------------43---
=============================================zuul===============================================
zuul
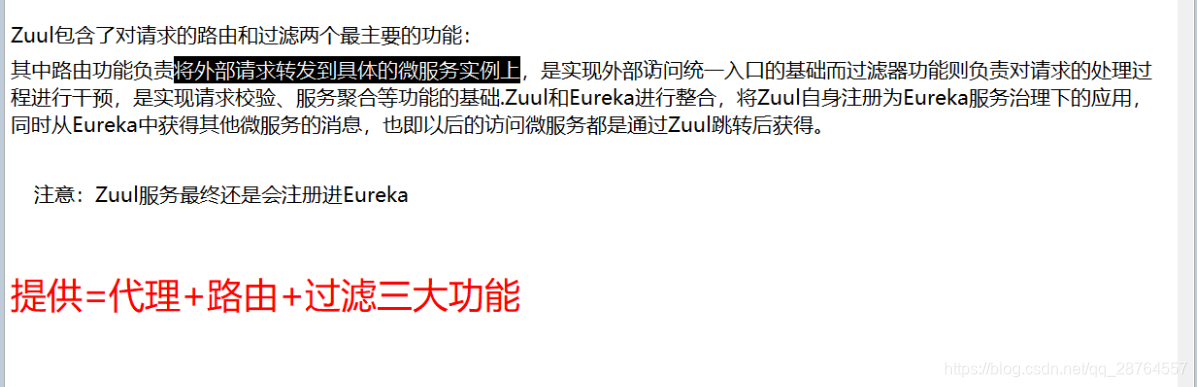
--------------------------------------------------------------------------------44--------------------------------------------------------------------------------
官网


1.pom
        <!-- zuul路由网关 -->
		<dependency>
			<groupId>org.springframework.cloud</groupId>
			<artifactId>spring-cloud-starter-zuul</artifactId>
		</dependency>
		<dependency>
			<groupId>org.springframework.cloud</groupId>
			<artifactId>spring-cloud-starter-eureka</artifactId>
		</dependency>
要搞到eureka上面因为也是在eureka上处理的。
完整的pom
<project xmlns="http://maven.apache.org/POM/4.0.0" xmlns:xsi="http://www.w3.org/2001/XMLSchema-instance"
	xsi:schemaLocation="http://maven.apache.org/POM/4.0.0 http://maven.apache.org/xsd/maven-4.0.0.xsd">
	<modelVersion>4.0.0</modelVersion>

	<parent>
		<groupId>com.atguigu.springcloud</groupId>
		<artifactId>microservicecloud</artifactId>
		<version>0.0.1-SNAPSHOT</version>
	</parent>

	<artifactId>microservicecloud-zuul-gateway-9527</artifactId>

	<dependencies>
		<!-- zuul路由网关 -->
		<dependency>
			<groupId>org.springframework.cloud</groupId>
			<artifactId>spring-cloud-starter-zuul</artifactId>
		</dependency>
		<dependency>
			<groupId>org.springframework.cloud</groupId>
			<artifactId>spring-cloud-starter-eureka</artifactId>
		</dependency>
		<!-- actuator监控 -->
		<dependency>
			<groupId>org.springframework.boot</groupId>
			<artifactId>spring-boot-starter-actuator</artifactId>
		</dependency>
		<!-- hystrix容错 -->
		<dependency>
			<groupId>org.springframework.cloud</groupId>
			<artifactId>spring-cloud-starter-hystrix</artifactId>
		</dependency>
		<dependency>
			<groupId>org.springframework.cloud</groupId>
			<artifactId>spring-cloud-starter-config</artifactId>
		</dependency>
		<!-- 日常标配 -->
		<dependency>
			<groupId>com.atguigu.springcloud</groupId>
			<artifactId>microservicecloud-api</artifactId>
			<version>${project.version}</version>
		</dependency>
		<dependency>
			<groupId>org.springframework.boot</groupId>
			<artifactId>spring-boot-starter-jetty</artifactId>
		</dependency>
		<dependency>
			<groupId>org.springframework.boot</groupId>
			<artifactId>spring-boot-starter-web</artifactId>
		</dependency>
		<dependency>
			<groupId>org.springframework.boot</groupId>
			<artifactId>spring-boot-starter-test</artifactId>
		</dependency>
		<!-- 热部署插件 -->
		<dependency>
			<groupId>org.springframework</groupId>
			<artifactId>springloaded</artifactId>
		</dependency>
		<dependency>
			<groupId>org.springframework.boot</groupId>
			<artifactId>spring-boot-devtools</artifactId>
		</dependency>
	</dependencies>

</project>
2.yml
server:
  port: 9527

spring:
  application:
    name: microservicecloud-zuul-gateway

eureka:
  client:
    service-url:
      defaultZone: http://eureka7001.com:7001/eureka,http://eureka7002.com:7002/eureka,http://eureka7003.com:7003/eureka
  instance:
    instance-id: gateway-9527.com
    prefer-ip-address: true


zuul:
#   ignored-services: microservicecloud-dept
  prefix: /atguigu
  ignored-services: "*"
  routes:
    mydept.serviceId: microservicecloud-dept
    mydept.path: /mydept/**

info:
  app.name: atguigu-microcloud
  company.name: www.atguigu.com
  build.artifactId: $project.artifactId$
  build.version: $project.version$
改host映射文件。

10.18.1.42	inspur
127.0.0.1 eureka7001.com
127.0.0.1 eureka7002.com
127.0.0.1 eureka7003.com
127.0.0.1 myzuul.com

127.0.0.1 xxlssoserver.com
127.0.0.1 xxlssoclient1.com
127.0.0.1 xxlssoclient2.com
3.主启动类:
package com.atguigu.springcloud;

import org.springframework.boot.SpringApplication;
import org.springframework.boot.autoconfigure.SpringBootApplication;
import org.springframework.cloud.netflix.zuul.EnableZuulProxy;

@SpringBootApplication
@EnableZuulProxy   //启动proxy是代理
public class Zuul_9527_StartSpringCloudApp
{
	public static void main(String[] args)
	{
		SpringApplication.run(Zuul_9527_StartSpringCloudApp.class, args);
	}
}
4.启动

zuul是注册到eureka上的
5.测试

不启用zuul:http://localhost:8001/dept/get/2
zuul不隐藏服务。配置ignore就不可以访问了:http://myzuul.com:9527/atguigu/microservicecloud-dept/dept/get/1

启用zuul:http://myzuul.com:9527/atguigu/mydept/dept/get/1
启用zuul要通过zuul去集群找到已经注册到集群得服务,再根据服务请求。
蓝色是zuul在eureka找到的微服务。
----------------------------------------------------------45--------------------------------------------
映射规则:

before的时候是路由zuul找到microservicecloud-dept然后访问方法。
改yml则可知是真名是诸葛亮mydept.serviceId,字mydept.path。
此时就可以了。
修改的东西
zuul:
  routes:
    mydept.serviceId: microservicecloud-dept
    mydept.path: /mydept/**
myzuul.com:9527/mydept/dept/get/1
这个就是隐藏了微服务的服务名。

接下来就是单入口单出口的设定。
ignored-services: microservicecloud-dept有一个问题目前是很多的微服务要批量处理:
ignored-services: "*"还有一个参数:
设置统一的公共的前缀:

zuul:
#使这个服务无效
#   ignored-services: microservicecloud-dept
  prefix: /atguigu
  ignored-services: "*"
  routes:
    mydept.serviceId: microservicecloud-dept
    mydept.path: /mydept/**
myzuul.com:9527/atguigu/mydept/dept/get/1

------------------------------------------------------路由访问的映射规则-------------------------------------------------------------46


Config Server分布式配置中心
远程的github库下载到本地,Config Server和外界的github沟通。


-------------------------------------------------------------------------------------47-------------------------------------------------------------------------------


1.在github新建一个名为microservicecloud-config的repository

2.根据上一步获得的ssh协议地址
[email protected]:FandyWw/microservicecloud-config.git
3.在本地硬盘新建一个git仓库并克隆
$ git clone [email protected]:FandyWw/microservicecloud-config.git
$ git status

4.在文件夹下新建配置

5.编写yml将yml推送到git上,格式必须是utf-8

spring:
  profiles:
    active:
    - dev
---
spring:
   profiles: dev  #开发环境
   application:
       name: microservicecloud-config-atguigu-dev
---
spring:
   profiles: test #测试环境
   application:
       name: microservicecloud-config-atguigu-test
6.推送到git上
$ git add .
$ git commit -m "init file"
$ git push origin master
7.新建model

8.修改yml内容
server:
  port: 3344

spring:
  application:
    name:  microservicecloud-config   //这个是微服务独有的服务名
  cloud:
    config:
      server:
        git:
          uri: [email protected]:FandyWw/microservicecloud-config.git #GitHub上面的git仓库名字
uri就是启动去git上获取application.yml
9.修改pom.xml的内容
<project xmlns="http://maven.apache.org/POM/4.0.0" xmlns:xsi="http://www.w3.org/2001/XMLSchema-instance" xsi:schemaLocation="http://maven.apache.org/POM/4.0.0 http://maven.apache.org/xsd/maven-4.0.0.xsd">
  <modelVersion>4.0.0</modelVersion>
  <parent>
    <groupId>com.atguigu.springcloud</groupId>
    <artifactId>microservicecloud</artifactId>
    <version>0.0.1-SNAPSHOT</version>
  </parent>
  <artifactId>microservicecloud-config-3344</artifactId>

  <dependencies>
		<!-- springCloud Config 这个说明3344是config的大管家-->
		<dependency>
			<groupId>org.springframework.cloud</groupId>
			<artifactId>spring-cloud-config-server</artifactId>
		</dependency>
		<!-- 避免Config的Git插件报错:org/eclipse/jgit/api/TransportConfigCallback -->
		<dependency>
			<groupId>org.eclipse.jgit</groupId>
			<artifactId>org.eclipse.jgit</artifactId>
			<version>4.10.0.201712302008-r</version>
		</dependency>
		<!-- 图形化监控 -->
		<dependency>
			<groupId>org.springframework.boot</groupId>
			<artifactId>spring-boot-starter-actuator</artifactId>
		</dependency>
		<!-- 熔断 -->
		<dependency>
			<groupId>org.springframework.cloud</groupId>
			<artifactId>spring-cloud-starter-hystrix</artifactId>
		</dependency>
		<dependency>
			<groupId>org.springframework.cloud</groupId>
			<artifactId>spring-cloud-starter-eureka</artifactId>
		</dependency>
		<dependency>
			<groupId>org.springframework.cloud</groupId>
			<artifactId>spring-cloud-starter-config</artifactId>
		</dependency>
		<dependency>
			<groupId>org.springframework.boot</groupId>
			<artifactId>spring-boot-starter-jetty</artifactId>
		</dependency>
		<dependency>
			<groupId>org.springframework.boot</groupId>
			<artifactId>spring-boot-starter-web</artifactId>
		</dependency>
		<dependency>
			<groupId>org.springframework.boot</groupId>
			<artifactId>spring-boot-starter-test</artifactId>
		</dependency>
		<!-- 热部署插件 -->
		<dependency>
			<groupId>org.springframework</groupId>
			<artifactId>springloaded</artifactId>
		</dependency>
		<dependency>
			<groupId>org.springframework.boot</groupId>
			<artifactId>spring-boot-devtools</artifactId>
		</dependency>
	</dependencies>

</project>
10.主配置类
package com.atguigu.springcloud;

import org.springframework.boot.SpringApplication;
import org.springframework.boot.autoconfigure.SpringBootApplication;
import org.springframework.cloud.config.server.EnableConfigServer;

@SpringBootApplication
@EnableConfigServer
public class Config_3344_StartSpringCloudApp
{
	public static void main(String[] args)
	{
		SpringApplication.run(Config_3344_StartSpringCloudApp.class, args);
	}
}
11.windows下修改host文件增加映射
10.18.1.42	inspur
127.0.0.1 eureka7001.com
127.0.0.1 eureka7002.com
127.0.0.1 eureka7003.com
127.0.0.1 myzuul.com
127.0.0.1 config-3344.com

127.0.0.1 xxlssoserver.com
127.0.0.1 xxlssoclient1.com
127.0.0.1 xxlssoclient2.com
12.测试

注意有问题
1.密钥https://blog.csdn.net/weixin_39112840/article/details/87869132
2.格式的错误https://blog.csdn.net/zdyueguanyun/article/details/79215972
访问:
config-3344.com:3344/application-dev.yml
总结:这个服务可以在github上获取信息。
--------------------------------------------------------------------48-----------------------------------------------------------------------------------
前提:打通了
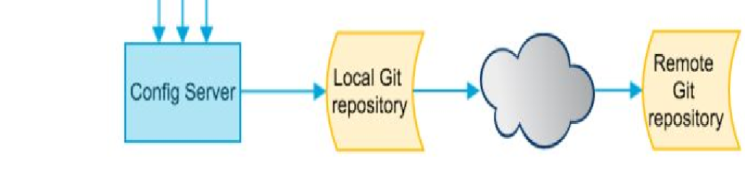
这个通道之后可知:

编辑一个yml名字为:
microservicecloud-config-client.yml
spring:
  profiles:
    active:
    - dev
---
server:
   port: 8201
spring:
    profiles: dev  #开发环境
     application:
       name: microservicecloud-config-client
eureka:
  client:
    service-url:
     defaultZone: http://eureka-dev.com:7001/eureka/
---
server:
   port: 8202
spring:
    profiles:  test   #测试环境
     application:
       name: microservicecloud-config-client
eureka:
  client:
    service-url:
defaultZone: http://eureka-dev.com:7001/eureka/遇到问题:https://segmentfault.com/q/1010000008066749
如果一切顺利则可知:
启动我们的3344的server读取GitHub上的yml文件解析:
输入网址看能否解析这个文件:
http://config-3344.com:3344/microservicecloud-config-client-dev.yml
全解析成功。
新建model:

流程:

1.pom注意加了什么?
<!-- SpringCloud Config客户端 -->
<dependency>
	<groupId>org.springframework.cloud</groupId>
	<artifactId>spring-cloud-starter-config</artifactId>
</dependency>
全部内容。
2.yml文件
bootstrap.yml
spring:
  cloud:
    config:
      name: microservicecloud-config-client #需要从github上读取的资源名称,注意没有yml后缀名
      profile: test   #本次访问的配置项
      label: master
      uri: http://config-3344.com:3344  #本微服务启动后先去找3344号服务,通过SpringCloudConfig获取GitHub的服务地址
注意读取的是yml的资源但是没有.yml
classload类装载器,是优先级最高的

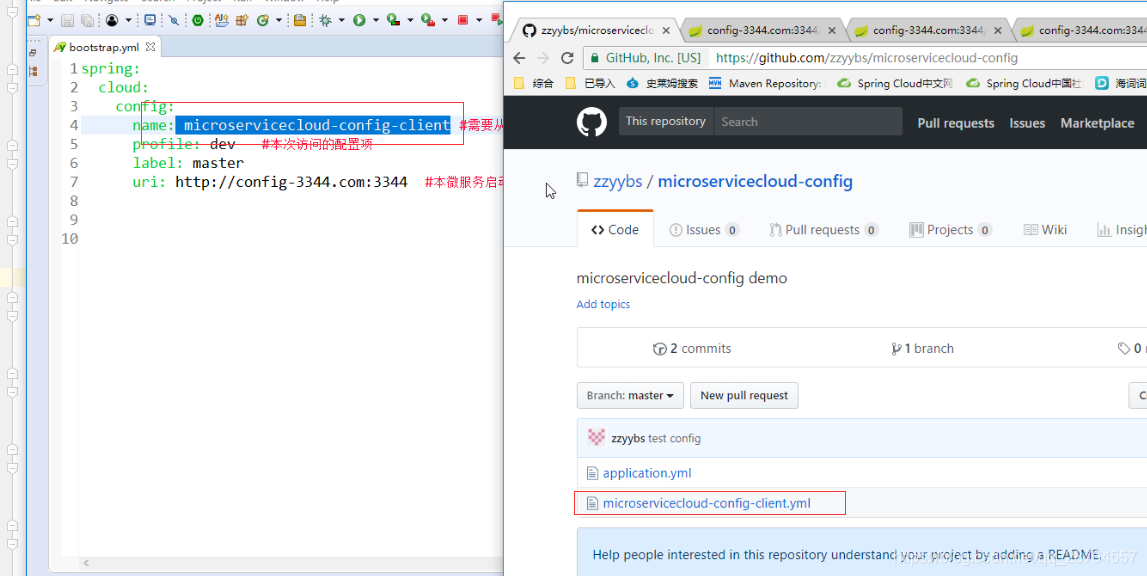

3.建yml
spring:
  application:
    name: microservicecloud-config-client
4.文件的映射

5.
10.18.1.42	inspur
127.0.0.1 eureka7001.com
127.0.0.1 eureka7002.com
127.0.0.1 eureka7003.com
127.0.0.1 myzuul.com
127.0.0.1 config-3344.com
127.0.0.1 client-config.com

127.0.0.1 xxlssoserver.com
127.0.0.1 xxlssoclient1.com
127.0.0.1 xxlssoclient2.com
6.在3355上创建类
package com.atguigu.springcloud.rest;

import org.springframework.beans.factory.annotation.Value;
import org.springframework.web.bind.annotation.RequestMapping;
import org.springframework.web.bind.annotation.RestController;

@RestController
public class ConfigClientRest
{

	@Value("${spring.application.name}")
	private String applicationName;

	@Value("${eureka.client.service-url.defaultZone}")
	private String eurekaServers;

	@Value("${server.port}")
	private String port;

	@RequestMapping("/config")
	public String getConfig()
	{
		String str = "applicationName: " + applicationName + "\t eurekaServers:" + eurekaServers + "\t port: " + port;
		System.out.println("******str: " + str);
		return "applicationName: " + applicationName + "\t eurekaServers:" + eurekaServers + "\t port: " + port;
	}
}
测试:


client-config.com:8202/config

spring:
  profiles:
    active:
    - dev
---
server:
   port: 8201
spring:
    profiles: dev  #开发环境
    application:
       name: microservicecloud-config-client
eureka:
  client:
    service-url:
     defaultZone: http://eureka-dev.com:7001/eureka/
---
server:
   port: 8202
spring:
    profiles:  test   #测试环境
    application:
       name: microservicecloud-config-client
eureka:
  client:
    service-url:
     defaultZone: http://eureka-dev.com:7001/eureka/
-------------------------------------------------------------------49-------------------------------------------------------------------------------------
springcloud的配置实战:


新建yml

spring:
  profiles:
    active:
    - dev


---
server:
  port: 7001

spring:
  profiles: dev
  application:
    name: microservicecloud-config-eureka-client

eureka:
  instance:
    hostname: eureka7001.com
  client:
    register-with-eureka: false
    fetch-registry: false
    service-url:
      defaultZone: http://eureka7001.com/eureka/
---
server:
  port: 7002

spring:
  profiles: test
  application:
    name: microservicecloud-config-eureka-client

eureka:
  instance:
    hostname: eureka7002.com
  client:
    register-with-eureka: false
    fetch-registry: false
    service-url:
      defaultZone: http://eureka7002.com/eureka/
更新到github
再新增一个文件
文件:
spring:
  profiles:
    active:
    - dev
---
server:
  port: 8001

mybatis:
  config-location: classpath:mybatis/mybatis.cfg.xml        # mybatis配置文件所在路径
  type-aliases-package: com.atguigu.springcloud.entities    # 所有Entity别名类所在包,告诉mybatis,扫描这个包的实体类
  mapper-locations:
  - classpath:mybatis/mapper/**/*.xml                       # mapper映射文件,写sql的

spring:
   profiles: test
   application:
    name: microservicecloud-config-dept-client                            #微服务的名字 很重要  这个是服务名 以后消费者就是按照这个服务名找到服务
   datasource:
    type: com.alibaba.druid.pool.DruidDataSource            # 当前数据源操作类型
    driver-class-name: org.gjt.mm.mysql.Driver              # mysql驱动包
    url: jdbc:mysql://192.168.244.130:3306/cloudDB01              # 数据库名称
    username: root
    password: 123456
    dbcp2:
      min-idle: 5                                           # 数据库连接池的最小维持连接数
      initial-size: 5                                       # 初始化连接数
      max-total: 5                                          # 最大连接数
      max-wait-millis: 200                                  # 等待连接获取的最大超时时间

eureka:
  client: #客户端注册进eureka服务列表内
    service-url:
      # defaultZone: http://localhost:7001/eureka   //这个是8001要入驻的地址就是入驻到eureka的服务器
      defaultZone: http://eureka7001.com:7001/eureka/,http://eureka7002.com:7002/eureka/,http://eureka7003.com:7003/eureka/
  instance:
    instance-id: microservicecloud-dept8001
    prefer-ip-address: true     #访问路径可以显示IP地址

info:
  app.name: atguigu-microservicecloud
  company.name: www.atguigu.com
  build.artifactId: $project.artifactId$
  build.version: $project.version$
---
server:
  port: 8001

mybatis:
  config-location: classpath:mybatis/mybatis.cfg.xml        # mybatis配置文件所在路径
  type-aliases-package: com.atguigu.springcloud.entities    # 所有Entity别名类所在包,告诉mybatis,扫描这个包的实体类
  mapper-locations:
  - classpath:mybatis/mapper/**/*.xml                       # mapper映射文件,写sql的

spring:
   profiles: dev
   application:
    name: microservicecloud-config-dept-client                             #微服务的名字 很重要  这个是服务名 以后消费者就是按照这个服务名找到服务
   datasource:
    type: com.alibaba.druid.pool.DruidDataSource            # 当前数据源操作类型
    driver-class-name: org.gjt.mm.mysql.Driver              # mysql驱动包
    url: jdbc:mysql://192.168.244.130:3306/cloudDB02              # 数据库名称
    username: root
    password: 123456
    dbcp2:
      min-idle: 5                                           # 数据库连接池的最小维持连接数
      initial-size: 5                                       # 初始化连接数
      max-total: 5                                          # 最大连接数
      max-wait-millis: 200                                  # 等待连接获取的最大超时时间

eureka:
  client: #客户端注册进eureka服务列表内
    service-url:
      # defaultZone: http://localhost:7001/eureka   //这个是8001要入驻的地址就是入驻到eureka的服务器
      defaultZone: http://eureka7001.com:7001/eureka/,http://eureka7002.com:7002/eureka/,http://eureka7003.com:7003/eureka/
  instance:
    instance-id: microservicecloud-dept8001
    prefer-ip-address: true     #访问路径可以显示IP地址

info:
  app.name: atguigu-microservicecloud
  company.name: www.atguigu.com
  build.artifactId: $project.artifactId$
  build.version: $project.version$
这个区别就是test环境是数据库2 dev是数据库1
步骤:


1.pom
<project xmlns="http://maven.apache.org/POM/4.0.0" xmlns:xsi="http://www.w3.org/2001/XMLSchema-instance" xsi:schemaLocation="http://maven.apache.org/POM/4.0.0 http://maven.apache.org/xsd/maven-4.0.0.xsd">
  <modelVersion>4.0.0</modelVersion>
  <parent>
    <groupId>com.atguigu.springcloud</groupId>
    <artifactId>microservicecloud</artifactId>
    <version>0.0.1-SNAPSHOT</version>
  </parent>
  <artifactId>microservicecloud-config-eureka-client-7001</artifactId>

  <dependencies>
		<!-- SpringCloudConfig配置 -->
		<dependency>
			<groupId>org.springframework.cloud</groupId>
			<artifactId>spring-cloud-starter-config</artifactId>
		</dependency>
		<dependency>
			<groupId>org.springframework.cloud</groupId>
			<artifactId>spring-cloud-starter-eureka-server</artifactId>
		</dependency>
		<!-- 热部署插件 -->
		<dependency>
			<groupId>org.springframework</groupId>
			<artifactId>springloaded</artifactId>
		</dependency>
		<dependency>
			<groupId>org.springframework.boot</groupId>
			<artifactId>spring-boot-devtools</artifactId>
		</dependency>
	</dependencies>
</project>
2.其他的基本的东西在7001上拷贝 主启动类等。
3.yml文件
spring:
  cloud:
    config:
      name: microservicecloud-config-eureka-client     #需要从github上读取的资源名称,注意没有yml后缀名
      profile: dev
      label: master
      uri: http://config-3344.com:3344      #SpringCloudConfig获取的服务地址
spring:
  application:
    name: microservicecloud-config-eureka-client
4.启动测试:


总结:主要就是引入了bootstrap进行github的读取 pom加入config-client在3344读取
-----------------------------------
配置版本的8001 可以切换数据库的

1.新建一个config版本的8001
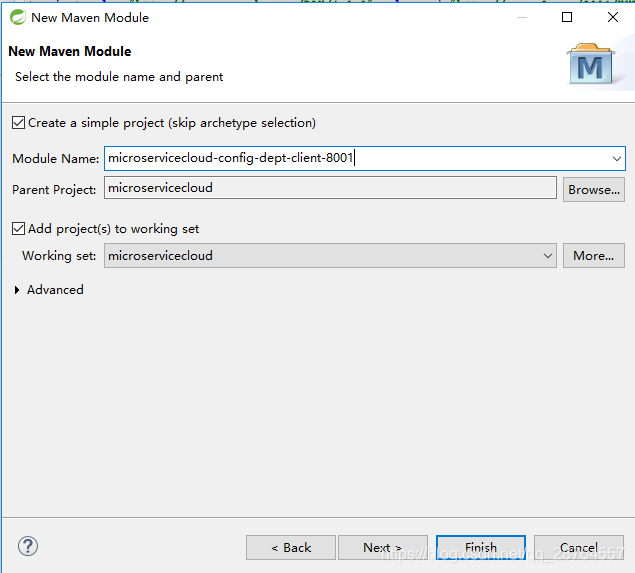
2.拷贝pom
<project xmlns="http://maven.apache.org/POM/4.0.0" xmlns:xsi="http://www.w3.org/2001/XMLSchema-instance" xsi:schemaLocation="http://maven.apache.org/POM/4.0.0 http://maven.apache.org/xsd/maven-4.0.0.xsd">
  <modelVersion>4.0.0</modelVersion>
  <parent>
    <groupId>com.atguigu.springcloud</groupId>
    <artifactId>microservicecloud</artifactId>
    <version>0.0.1-SNAPSHOT</version>
  </parent>
  <artifactId>microservicecloud-config-dept-client-8001</artifactId>

  	<dependencies>
		<!-- SpringCloudConfig配置 -->
		<dependency>
			<groupId>org.springframework.cloud</groupId>
			<artifactId>spring-cloud-starter-config</artifactId>
		</dependency>
		<dependency>
			<groupId>org.springframework.boot</groupId>
			<artifactId>spring-boot-starter-actuator</artifactId>
		</dependency>
		<dependency>
			<groupId>org.springframework.cloud</groupId>
			<artifactId>spring-cloud-starter-eureka</artifactId>
		</dependency>
		<dependency>
			<groupId>com.atguigu.springcloud</groupId>
			<artifactId>microservicecloud-api</artifactId>
			<version>${project.version}</version>
		</dependency>
		<dependency>
			<groupId>junit</groupId>
			<artifactId>junit</artifactId>
		</dependency>
		<dependency>
			<groupId>mysql</groupId>
			<artifactId>mysql-connector-java</artifactId>
		</dependency>
		<dependency>
			<groupId>com.alibaba</groupId>
			<artifactId>druid</artifactId>
		</dependency>
		<dependency>
			<groupId>ch.qos.logback</groupId>
			<artifactId>logback-core</artifactId>
		</dependency>
		<dependency>
			<groupId>org.mybatis.spring.boot</groupId>
			<artifactId>mybatis-spring-boot-starter</artifactId>
		</dependency>
		<dependency>
			<groupId>org.springframework.boot</groupId>
			<artifactId>spring-boot-starter-jetty</artifactId>
		</dependency>
		<dependency>
			<groupId>org.springframework.boot</groupId>
			<artifactId>spring-boot-starter-web</artifactId>
		</dependency>
		<dependency>
			<groupId>org.springframework.boot</groupId>
			<artifactId>spring-boot-starter-test</artifactId>
		</dependency>
		<dependency>
			<groupId>org.springframework</groupId>
			<artifactId>springloaded</artifactId>
		</dependency>
		<dependency>
			<groupId>org.springframework.boot</groupId>
			<artifactId>spring-boot-devtools</artifactId>
		</dependency>
	</dependencies>
</project>
3.一些类
在8001上拷贝
4.yml
spring:
  cloud:
    config:
      name: microservicecloud-config-dept-client #需要从github上读取的资源名称,注意没有yml后缀名
      #profile配置是什么就取什么配置dev or test
      profile: dev
      #profile: test
      label: master
      uri: http://config-3344.com:3344  #SpringCloudConfig获取的服务地址
spring:
  application:
    name: microservicecloud-config-dept-client
5.测试:
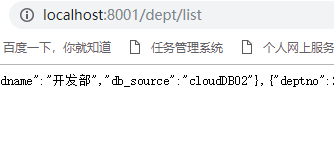
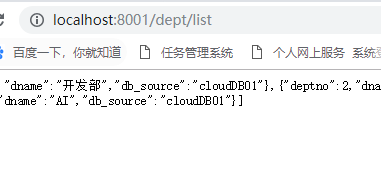
正规的玩法:
在github上改的配置。
-------------------------------------------------------------------50-------------------------------------------------------------------------------------
最后附上代码地址和数据库建表语句:
-- auto-generated definition
create table dept
(
  deptno    bigint auto_increment
    primary key,
  dname     varchar(60) null,
  db_source varchar(60) null
);
数据库:
github地址:
https://github.com/FandyWw/springcloud-last


智能推荐
class和struct的区别-程序员宅基地
文章浏览阅读101次。4.class可以有⽆参的构造函数,struct不可以,必须是有参的构造函数,⽽且在有参的构造函数必须初始。2.Struct适⽤于作为经常使⽤的⼀些数据组合成的新类型,表示诸如点、矩形等主要⽤来存储数据的轻量。1.Class⽐较适合⼤的和复杂的数据,表现抽象和多级别的对象层次时。2.class允许继承、被继承,struct不允许,只能继承接⼝。3.Struct有性能优势,Class有⾯向对象的扩展优势。3.class可以初始化变量,struct不可以。1.class是引⽤类型,struct是值类型。
android使用json后闪退,应用闪退问题:从json信息的解析开始就会闪退-程序员宅基地
文章浏览阅读586次。想实现的功能是点击顶部按钮之后按关键字进行搜索,已经可以从服务器收到反馈的json信息,但从json信息的解析开始就会闪退,加载listview也不知道行不行public abstract class loadlistview{public ListView plv;public String js;public int listlength;public int listvisit;public..._rton转json为什么会闪退
如何使用wordnet词典,得到英文句子的同义句_get_synonyms wordnet-程序员宅基地
文章浏览阅读219次。如何使用wordnet词典,得到英文句子的同义句_get_synonyms wordnet
系统项目报表导出功能开发_积木报表 多线程-程序员宅基地
文章浏览阅读521次。系统项目报表导出 导出任务队列表 + 定时扫描 + 多线程_积木报表 多线程
ajax 如何从服务器上获取数据?_ajax 获取http数据-程序员宅基地
文章浏览阅读1.1k次,点赞9次,收藏9次。使用AJAX技术的好处之一是它能够提供更好的用户体验,因为它允许在不重新加载整个页面的情况下更新网页的某一部分。另外,AJAX还使得开发人员能够创建更复杂、更动态的Web应用程序,因为它们可以在后台与服务器进行通信,而不需要打断用户的浏览体验。在Web开发中,AJAX(Asynchronous JavaScript and XML)是一种常用的技术,用于在不重新加载整个页面的情况下,从服务器获取数据并更新网页的某一部分。使用AJAX,你可以创建异步请求,从而提供更快的响应和更好的用户体验。_ajax 获取http数据
Linux图形终端与字符终端-程序员宅基地
文章浏览阅读2.8k次。登录退出、修改密码、关机重启_字符终端
随便推点
Python与Arduino绘制超声波雷达扫描_超声波扫描建模 python库-程序员宅基地
文章浏览阅读3.8k次,点赞3次,收藏51次。前段时间看到一位发烧友制作的超声波雷达扫描神器,用到了Arduino和Processing,可惜啊,我不会Processing更看不懂人家的程序,咋办呢?嘿嘿,所以我就换了个思路解决,因为我会一点Python啊,那就动手吧!在做这个案例之前先要搞明白一个问题:怎么将Arduino通过超声波检测到的距离反馈到Python端?这个嘛,我首先想到了串行通信接口。没错!就是串口。只要Arduino将数据发送给COM口,然后Python能从COM口读取到这个数据就可以啦!我先写了一个测试程序试了一下,OK!搞定_超声波扫描建模 python库
凯撒加密方法介绍及实例说明-程序员宅基地
文章浏览阅读4.2k次。端—端加密指信息由发送端自动加密,并且由TCP/IP进行数据包封装,然后作为不可阅读和不可识别的数据穿过互联网,当这些信息到达目的地,将被自动重组、解密,而成为可读的数据。不可逆加密算法的特征是加密过程中不需要使用密钥,输入明文后由系统直接经过加密算法处理成密文,这种加密后的数据是无法被解密的,只有重新输入明文,并再次经过同样不可逆的加密算法处理,得到相同的加密密文并被系统重新识别后,才能真正解密。2.使用时,加密者查找明文字母表中需要加密的消息中的每一个字母所在位置,并且写下密文字母表中对应的字母。_凯撒加密
工控协议--cip--协议解析基本记录_cip协议embedded_service_error-程序员宅基地
文章浏览阅读5.7k次。CIP报文解析常用到的几个字段:普通类型服务类型:[0x00], CIP对象:[0x02 Message Router], ioi segments:[XX]PCCC(带cmd和func)服务类型:[0x00], CIP对象:[0x02 Message Router], cmd:[0x101], fnc:[0x101]..._cip协议embedded_service_error
如何在vs2019及以后版本(如vs2022)上添加 添加ActiveX控件中的MFC类_vs添加mfc库-程序员宅基地
文章浏览阅读2.4k次,点赞9次,收藏13次。有时候我们在MFC项目开发过程中,需要用到一些微软已经提供的功能,如VC++使用EXCEL功能,这时候我们就能直接通过VS2019到如EXCEL.EXE方式,生成对应的OLE头文件,然后直接使用功能,那么,我们上篇文章中介绍了vs2017及以前的版本如何来添加。但由于微软某些方面考虑,这种方式已被放弃。从上图中可以看出,这一功能,在从vs2017版本15.9开始,后续版本已经删除了此功能。那么我们如果仍需要此功能,我们如何在新版本中添加呢。_vs添加mfc库
frame_size (1536) was not respected for a non-last frame_frame_size (1024) was not respected for a non-last-程序员宅基地
文章浏览阅读785次。用ac3编码,执行编码函数时报错入如下:[ac3 @ 0x7fed7800f200] frame_size (1536) was not respected for anon-last frame (avcodec_encode_audio2)用ac3编码时每次送入编码器的音频采样数应该是1536个采样,不然就会报上述错误。这个数字并非刻意固定,而是跟ac3内部的编码算法原理相关。全网找不到,国内音视频之路还有很长的路,音视频人一起加油吧~......_frame_size (1024) was not respected for a non-last frame
Android移动应用开发入门_在安卓移动应用开发中要在活动类文件中声迷你一个复选框变量-程序员宅基地
文章浏览阅读230次,点赞2次,收藏2次。创建Android应用程序一个项目里面可以有很多模块,而每一个模块就对应了一个应用程序。项目结构介绍_在安卓移动应用开发中要在活动类文件中声迷你一个复选框变量